Category: Webtools
How to Teach With Videos
 A topic I get a lot of questions on lately is videos. I reviewed mysimpleshow, a new tool that is getting a lot of buzz, and then asked them to share how their digital tool addresses this burgeoning interest in video. Here are some ideas:
***
Educators – as you know, we’re in a digital world, and using technology in the classroom such as video as a means of communicating messages is taking over. The days of checking books out of the library, traditional style lecturing, and writing papers with a pen are continuously becoming pastimes. Academia is transforming in a way that responds to most of its younger inhabitants: digital natives who have a knack for technology.
Using technology in and outside of the classroom as a means of teaching and learning is valuable to both educators and students. Teachers can impact and engage their students while learning about new technology tools at the same time. Students can relate to media and technology, whether it be through watching or making videos with mysimpleshow, using apps on smartphones, or logging in to LMS systems to access their online textbook.
Share this:
- Click to share on Facebook (Opens in new window) Facebook
- Click to share on X (Opens in new window) X
- Click to share on LinkedIn (Opens in new window) LinkedIn
- Click to share on Pinterest (Opens in new window) Pinterest
- Click to share on Telegram (Opens in new window) Telegram
- Click to email a link to a friend (Opens in new window) Email
- More
8 Reasons Why Students Should Create Videos and 15 Webtools to Do That
 For decades, teachers have used videos in the classroom to share information. They communicate a message with audio, visual, motion, color, and spatial details, making videos much more effective than traditional approaches like reading from a text, lecturing, or showing a slideshow. As a result, students retain more information, understand concepts more rapidly, are more enthusiastic about what they are learning, and make new connections between curriculum topics and the world outside the classroom.
So why shouldn’t students create videos when constructing knowledge for formative or summative assessments? Why insist they write a report, participate in a play, or create a poster instead? Here are eight reasons why students should always be offered the option of using flexible learning paths such as videos to leverage their ideas:
Practice writing skills
To tape a video, students must first prepare a storyboard that follows class writing conventions. Before they can turn the camera on, they must draft the script, edit, and rewrite–sound familiar? That’s right out of Common Core writing standards. When preparing for a video, students won’t mind because they’re excited about the goal.
Share this:
- Click to share on Facebook (Opens in new window) Facebook
- Click to share on X (Opens in new window) X
- Click to share on LinkedIn (Opens in new window) LinkedIn
- Click to share on Pinterest (Opens in new window) Pinterest
- Click to share on Telegram (Opens in new window) Telegram
- Click to email a link to a friend (Opens in new window) Email
- More
15 Good Replacements for ScreenChomp
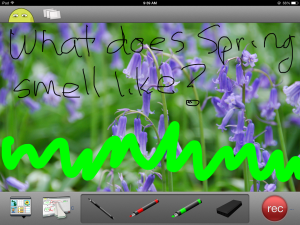 For years, TechSmith’s ScreenChomp app has been my go-to resource for whiteboard drawings, screencasts, and for an uncluttered online art platform for students using iPads. ScreenChomp did a masterful job of making everything needed for each of these activities intuitive even for young users. For older students, ScreenChomp made it easy to provide personalized feedback by writing or recording comments directly onto their digital work and then sharing it back to them.
There are more uses, but none of them matter right now because ScreenChomp has been retired. According to TechSmith, it no longer fits their larger business goals. I’m not here to judge those; what matters for teachers is that we must now fill the hole left by the loss of ScreenChomp. Like Kerpoof, thousands of educators are scrambling to replace a fundamental tool that was to be an integral part of their 2016-17 lesson plans.
Let me help you with that. Here are options for the most common four activities (art, picture annotation, screencast, and whiteboard) you probably used ScreenChomp for. Since it was an iPad app, I’ve limited the replacement options to that platform:
Art
Create a drawing by fingerpainting, adding stamps, and inserting text. You can even connect with a friend to draw together over the Internet. Price: Free
Share this:
- Click to share on Facebook (Opens in new window) Facebook
- Click to share on X (Opens in new window) X
- Click to share on LinkedIn (Opens in new window) LinkedIn
- Click to share on Pinterest (Opens in new window) Pinterest
- Click to share on Telegram (Opens in new window) Telegram
- Click to email a link to a friend (Opens in new window) Email
- More
10 Ways to Use Thinglink in the Inquiry-based Classroom
 I follow a lot of tech ed forums (like Larry Ferlazzo, Richard Byrne, and Alice Keeler) as a way of keeping up with tech ed trends and what teachers are using in their classrooms. The last few months, it’s been Thinglink. I’ve received more than a handful of questions about this multimedia webtool on my Ask a Tech Teacher Q&A column and it’s popped up in many education discussions about inquiry assessments and year-end summatives. I met Thinglink a few years ago and–like colleagues–was so excited, it often became a favored part of lesson plans to enable students to share their knowledge.
Then, I got away from it. Like Typing Club (a few years ago, this was everyone’s go-to online keyboarding program and then fizzled away), the tech ed opinion leaders moved on. Me, too. I read about so many new tools that I got sidetracked from this phenomenally versatile, robust, and differentiated tool. When I went back and took a second look, I again was soundly impressed and came up with lots of ways to integrate it into my workflow.
Before I get into those, let me back up and explain Thinglink: It is an interactive media platform that allows students to use multimedia content and links to share their knowledge and tell their story by tagging images or videos with hotspots that include additional information.
[gallery columns="2" ids="8521,10525"]This includes photos, videos, maps, pictures, and drawings. Completed projects can be collected into channels that are then shared with colleagues or select students. They can also be shared via social media, a link, or embedded into blogs or websites. With the new addition of 360-degree images and virtual reality (available on the upgraded platform), it has again become one of the most exciting learning tools in the educator’s toolkit.
Share this:
- Click to share on Facebook (Opens in new window) Facebook
- Click to share on X (Opens in new window) X
- Click to share on LinkedIn (Opens in new window) LinkedIn
- Click to share on Pinterest (Opens in new window) Pinterest
- Click to share on Telegram (Opens in new window) Telegram
- Click to email a link to a friend (Opens in new window) Email
- More
Haiku Deck Just Got Better: Welcome Haiku Deck Classroom
 If you’re like me–and 20% of US schools–when you think of ‘online slideshow tool’, you think of Haiku Deck. And now, your favorite tool just got better. Haiku Deck Classroom offers an easy way for educators to add and manage student accounts, integrate with Google Classroom and other CMS systems, sign in through Google, share projects to a classroom gallery, and more. Haiku Deck Classroom makes all the features of Haiku Deck Pro available to educators and students, including unlimited presentation creation, advanced privacy settings, offline viewing and printing, and YouTube video embedding. The subscription applies to use of Haiku Deck’s award-winning web, iPad, and iPhone apps.
Additional features include:
Share this:
- Click to share on Facebook (Opens in new window) Facebook
- Click to share on X (Opens in new window) X
- Click to share on LinkedIn (Opens in new window) LinkedIn
- Click to share on Pinterest (Opens in new window) Pinterest
- Click to share on Telegram (Opens in new window) Telegram
- Click to email a link to a friend (Opens in new window) Email
- More
Padlet: A Versatile Classroom Tool
 One of the most popular, free tools used by thousands of schools is a virtual bulletin board called Padlet. It starts as a blank canvas (called a ‘wall’) to which users can add text, video, images, weblinks, and more. It can be accessed via a direct link that is posted or emailed, or an embed in any digital platform that accepts these HTML codes (such as a blog, website, or wiki). It can be managed from the website, a mobile device, or with a Chrome app or extension. Walls can also be emailed, printed, social shared, or saved as an image or PDF file. Individual accounts are free; education accounts are charged per teacher.
Here’s how it works:
- set up an account so that you can save and share your walls
- quickly and easily create your first wall with a customized background, title, and layout. Backgrounds include lined paper, blueprint, a chalkboard, and more.
- once the set-up is completed share the link or embed with students
- to participate, all students do is tap the screen and add their comment
Pros
If you have a Google account, you can use your Google account to sign on. No need to create a new account.
All walls are by default semi-private — accessed only through the direct link or the embed, but privacy options range from ‘private’ to ‘public’. You choose your level of transparency.
An unusual ‘save’ option is to export as a PDF. This creates a completed document that is platform-neutral.
Amazingly, the walls are ad-free whether you’re on the website or the embed. I don’t know how they manage this, but I’m thrilled — and hope it lasts!
Cons
Share this:
- Click to share on Facebook (Opens in new window) Facebook
- Click to share on X (Opens in new window) X
- Click to share on LinkedIn (Opens in new window) LinkedIn
- Click to share on Pinterest (Opens in new window) Pinterest
- Click to share on Telegram (Opens in new window) Telegram
- Click to email a link to a friend (Opens in new window) Email
- More
4 Ways to Use Podcasts in the Classroom
 As teachers get more creative about differentiating for student needs, we’re turning to tools that use other approaches than writing a report or creating a class play. One I hear more and more about is podcasts. Ask a Tech Teacher contributor, Emily Southey, has some thoughts on how to integrate podcasts into your lesson planning:
In the age of technology, students and teachers alike listen to podcasts in their spare time. They are funny, entertaining, and often educational. Podcasts are episodic series of audio, video, or PDF files that can be downloaded or streamed through the internet. In addition to the podcasts that already exist in the world, there are enormous benefits to having your students record podcasts of their own. I have found that podcasts can be used both as material for class and as an evaluation tool. What follows are 4 ways that podcasts can be introduced into the classroom. Enjoy!
As an alternative to an oral report
Oral presentations can get old for both the students and the teacher. Having students record their presentations as podcasts and upload them to the class website can be both a class time saver as well as a medium where students can express their creativity with the option to include music or interviews. In addition, assigning a podcast instead of an oral report may allow the shyer students in the class to flourish, as their fears about standing up in front of their peers will be mitigated. This lesson plan from Dr. Pastore highlights several topics that students could create a podcast on with links to examples of podcasts that cover courses ranging from French as a second language to math.
Share this:
- Click to share on Facebook (Opens in new window) Facebook
- Click to share on X (Opens in new window) X
- Click to share on LinkedIn (Opens in new window) LinkedIn
- Click to share on Pinterest (Opens in new window) Pinterest
- Click to share on Telegram (Opens in new window) Telegram
- Click to email a link to a friend (Opens in new window) Email
- More
3 Creative Tech Tools to Teach Writing
 What is ‘writing’? If you look it up in the Free Dictionary, you find this definition:
The act or process of producing and recording words in a form that can be read and understood
This focuses on recording words that are then communicated to others. In fact, if you ask students (and too often, teachers), to define ‘writing’, they probably agree with the Free Dictionary, adding that writing uses a pencil and paper (maybe a word processing program), requires language skills such as grammar, spelling, sentence fluency, and paragraph construction, and revolves around activities such as taking notes, conducting research, writing an essay, or composing a story.
Today in the 21st Century schools, they’d be wrong. What they have defined as ‘writing’ is actually writing conventions, tools, and activities rather than its purpose, goals, and definition. Let’s look at a different definition, this one from Merriam-Webster:
…the way you use written words to express ideas or opinions
This one is well-aligned with the goals of most popular writing curricula and the Common Core Standards:
To build a foundation for college and career readiness, students need to learn to use writing as a way of offering and supporting opinions, demonstrating understanding of the subjects they are studying, and conveying real and imagined experiences and events. They learn to appreciate that a key purpose of writing is to communicate clearly to an external, sometimes unfamiliar audience, and they begin to adapt the form and content of their writing to accomplish a particular task and purpose. They develop the capacity to build knowledge on a subject through research projects and to respond analytically to literary and informational sources.
Share this:
- Click to share on Facebook (Opens in new window) Facebook
- Click to share on X (Opens in new window) X
- Click to share on LinkedIn (Opens in new window) LinkedIn
- Click to share on Pinterest (Opens in new window) Pinterest
- Click to share on Telegram (Opens in new window) Telegram
- Click to email a link to a friend (Opens in new window) Email
- More
9 Google Apps Tips You Don’t Want to Miss
 Here are the top 9 nine Google Apps tips according to Ask a Tech Teacher readers:
- Embed a File from Google Drive
- How to Embed Student Work into Digital Portfolios
- Book Review: Google Apps Meets Common Core
- Dear Otto: How do I teach Google Drive to K/1?
- Google Gravity
- Google Apps Support Bloom’s Taxonomy–Take a Look
Share this:
- Click to share on Facebook (Opens in new window) Facebook
- Click to share on X (Opens in new window) X
- Click to share on LinkedIn (Opens in new window) LinkedIn
- Click to share on Pinterest (Opens in new window) Pinterest
- Click to share on Telegram (Opens in new window) Telegram
- Click to email a link to a friend (Opens in new window) Email
- More
7 Must-have Tools for Ed Conferences
 It’s summer, time for teachers to recharge their cerebral batteries. That could mean reading, going on field trips, spending time with online PLNs, or taking calls from family members who usually end up at voice mail. For many, it means attending conferences like ISTE and NEA to learn how the heck to integrate technology into their lesson plans. If you aren’t a veteran conference attendee, you may wonder what you should bring. That’s a fair questions considering learning is no longer done sitting in auditoriums nodding off to the wisdom of a guest speaker behind a podium. Now, you might be asked to scan a QR code and visit a website, access meeting documents online, interact digitally, or use a backchannel device to share your real-time thoughts with the presenter. Besides a toothbrush and aspirin, what should you take to your upcoming conference? Here are five tools that will make you look and act like the Diva of Digital:
Waze
Some conferences take multiple buildings spread out over several blocks, and depending upon the number of attendees (ISTE last year had about 13,000), your hotel may not be around the corner from the Hall. Install Waze on your smartphone or iPad (here’s my review of Waze).
Conference App
Most educational conferences have one. I find these more useful than the conference website. They are geared for people who are manipulating digital device one-handed, half their attention on the phone and the rest on traffic, meaning: they’re simple and straight-forward. Test drive it so you know where the buttons are, then use it to find meeting rooms, changes in schedules, and updates.
Share this:
- Click to share on Facebook (Opens in new window) Facebook
- Click to share on X (Opens in new window) X
- Click to share on LinkedIn (Opens in new window) LinkedIn
- Click to share on Pinterest (Opens in new window) Pinterest
- Click to share on Telegram (Opens in new window) Telegram
- Click to email a link to a friend (Opens in new window) Email
- More

