Category: Videos
15 Webtools in 15 Weeks–the video
15 Webtools in 15 Weeks
This video is from a series I taught for school districts. It is now available for free to subscribers of Ask a Tech Teacher:
Summary
Teach 15 internet tools over 15 weeks, engaging students in exploration and teaching, while fostering digital citizenship and problem-solving skills.
Highlights
- 🌟 Engaging Project: Students teach each other 15 internet tools, promoting excitement and exploration.
- 👩🏫 Student-Centered: Learners take charge, becoming teachers and sharing newfound knowledge with classmates.
- 🤝 Collaboration: Students work in groups, enhancing teamwork and communication skills.
- 📚 Digital Citizenship: Emphasis on safe online practices and fair use of content is integrated into lessons.
- 🛠️ Tool Selection: Teachers curate tools based on input from grade-level colleagues to ensure relevance.
- 📅 Flexible Timing: Each presentation takes 20-30 minutes, allowing for other curriculum activities.
- 🎉 Fun Wrap-Up: The project serves as an engaging end-of-year activity, keeping students motivated.
Key Insights
- 🌍 Empowering Learners: By allowing students to select and teach tools, they develop ownership of their learning process, fostering independence and confidence.
- 💡 Authentic Learning: Teachers learn alongside students, creating a shared experience that models lifelong learning and curiosity.
- 🎯 Academic Relevance: Integrating tools relevant to future grades ensures that students are prepared for academic expectations, enhancing their transition to the next level.
- 📈 Reflective Practice: Incorporating reflections into the project promotes metacognition, helping students understand their learning journey and areas for improvement.
- 🏆 Focused Assessment: Clear grading rubrics guide students in expectations and encourage high-quality presentations, emphasizing knowledge and teaching ability.
- 🌐 Resource Creation: Students build a library of resources for future classes, promoting a culture of sharing and collaboration within the school community.
- 🎊 Exciting Conclusion: The project culminates the school year on a high note, emphasizing creativity and student engagement, making learning enjoyable.
–summarized by NoteGPT
This video is from a series I taught for school districts. It is now available for free to Ask a Tech Teacher subscribers. Videos include (in alphabetic order): (more…)
Share this:
- Click to share on Facebook (Opens in new window) Facebook
- Click to share on X (Opens in new window) X
- Click to share on LinkedIn (Opens in new window) LinkedIn
- Click to share on Pinterest (Opens in new window) Pinterest
- Click to share on Telegram (Opens in new window) Telegram
- Click to email a link to a friend (Opens in new window) Email
- More
11 Online Resources About Animation
Creating animations for the web can be achieved using various tools, ranging from beginner to advanced, depending on your needs and expertise. Here are some webtools and tips to get you started:
Webtools
Beginner (more…)
Share this:
- Click to share on Facebook (Opens in new window) Facebook
- Click to share on X (Opens in new window) X
- Click to share on LinkedIn (Opens in new window) LinkedIn
- Click to share on Pinterest (Opens in new window) Pinterest
- Click to share on Telegram (Opens in new window) Telegram
- Click to email a link to a friend (Opens in new window) Email
- More
How do you teach the hard to teach class? Watch the video.
How do you teach the hard to teach class? Differentiate
This video is from a series I taught for school districts. It is now available for free, here on Ask a Tech Teacher:
Summary
Strategies for teaching challenging classes include student involvement, differentiated instruction, and utilizing technology for engagement.
Highlights
- 📚 Student Input: Encourage students to provide input on learning goals.
- 🖥️ Tech Tools: Incorporate web-based tools for enhanced learning experiences.
- 🔄 Flipped Classroom: Reverse traditional teaching methods to engage students effectively.
- 💬 Back Channel Devices: Use platforms for real-time student feedback during lessons.
- 🤝 Collaboration: Work with other teachers on projects for a cohesive learning experience.
- ✍️ Active Participation: Transform students from passive consumers to active contributors.
- 🎨 Creative Assessment: Move away from static checklists and embrace dynamic evaluation methods.
Key Insights
- 🌍 Understanding Learning Styles: Recognizing that students learn differently allows for tailored teaching approaches. Emphasizing this can create a more inclusive classroom environment.
- 🔧 Encouraging Risk-Taking: Allowing students to explore and troubleshoot fosters independence and problem-solving skills, preparing them for real-world challenges.
- 🎯 Setting Big Goals: Establishing overarching goals rather than granular tasks helps students focus on the essential learning objectives.
- 💻 Emphasizing Digital Citizenship: Teaching students how to use digital tools responsibly equips them for future academic and professional environments.
- 🏆 Value of Mistakes: Demonstrating that mistakes are learning opportunities encourages resilience and promotes a growth mindset among students.
- 💡 Differentiation in Instruction: Adjusting lessons based on individual student needs can re-engage those who may struggle with traditional methods.
- 🕒 Flexibility in Time Management: Allowing students to spend a portion of their time on self-directed projects cultivates creativity and ownership over their learning.
–summarized by NoteGPT
This video is from a series I taught for school districts. It is now available for free to Ask a Tech Teacher subscribers. Videos include (in alphabetic order): (more…)
Share this:
- Click to share on Facebook (Opens in new window) Facebook
- Click to share on X (Opens in new window) X
- Click to share on LinkedIn (Opens in new window) LinkedIn
- Click to share on Pinterest (Opens in new window) Pinterest
- Click to share on Telegram (Opens in new window) Telegram
- Click to email a link to a friend (Opens in new window) Email
- More
Step-by-Step Guide to Edit a Video
Many educators–and students–would like to use video to share ideas, but can’t master the skills required to edit out parts they don’t want. One of our Ask a Tech Teacher contributors has a simple way to accomplish this:
How to Cut Unwanted Parts of a Video: a Step-By-Step Guide
Video editing is a powerful tool that enables you to refine your footage, eliminate unwanted sections, and produce professional-looking content. One crucial aspect of video editing is the ability to remove unnecessary parts from your videos.
You can use this editing technique for different purposes, like correcting errors, trimming lengthy scenes, removing distractions, or improving your old videos. Here, you can find out how to digitize old video recordings.
In this step-by-step guide, you will discover the process of cutting unwanted parts from your videos using video editing software. You will be able to create concise and captivating videos that keep your audience engaged.
Share this:
- Click to share on Facebook (Opens in new window) Facebook
- Click to share on X (Opens in new window) X
- Click to share on LinkedIn (Opens in new window) LinkedIn
- Click to share on Pinterest (Opens in new window) Pinterest
- Click to share on Telegram (Opens in new window) Telegram
- Click to email a link to a friend (Opens in new window) Email
- More
How to Digitize School Historic Videos
Why is it important to preserve historical school video recordings? How about:
- to preserve old recordings that are degrading with time
- to make them more accessible to potential viewers and researchers
- to increase their lifespan
But what’s the best way to do this? Ask a Tech Teacher contributor has some ideas:
3 Effective Ways to Digitize and Preserve School’s Historical Video Recordings
Each year, schools manage and process all sorts of documents and data, starting with students’ personal information and ending with events. These data are stored in each school’s archive for safekeeping over the years.
Therefore, any such archive often contains a mixture of materials that are relevant to the school’s past and present, such as photographs, yearbooks, student publications (newspapers or magazines), administrative records, meeting minutes, curricular materials, and artifacts from significant events.
Schools also keep video records of important activities (usually sports-related), security logs, student performances, teacher evaluations, or historical events like lectures from famous people visiting the campus.
These recordings can serve a plethora of purposes, so it’s only natural that your school wants to make sure the information is well-preserved. And one way to make sure video recordings don’t get damaged over time (especially ones on old storage formats like VHS tapes) is to digitize them.
As such, today we’ll look at some of the most common methods to digitize historical video records and how to make sure the new formats are well-preserved and safe from accidental loss or damage.
How to Digitize Old Video Recordings
Turning old video recordings into digital format is not too difficult, but it can be time-consuming. So, depending on the resources and time you have at your disposal, you can use one of the methods listed below.
1 Use a Video Capture Device (or Digital Converter)
Using a video capture device to convert old videos to digital format is a relatively straightforward process. But you’ll need a few devices, like an old video player (like VCR or camcorder), a computer, and a video capture device.
Once you have all the devices, plus the old video tapes you want to digitize, install the software for the capture device on the computer. Next, connect the video player to the capture device using an RCA cable. This way, you’ll connect the VCR’s output jacks (typically yellow for video, white and red for audio) to the corresponding input jacks of the capture device.
Lastly, connect the USB end of your video capture device to an available USB port on your computer, open the software, and configure the settings. Press play and wait for the capture device to do its job.
The disadvantage of this method is that you can’t speed things up. You have to wait for each tape to play its full length so the capture device can get the entire footage. Also, it’s difficult to create a clean digital copy without breaks for changing the tapes or noise.
It’s also a method for tech-savvy users since you have to understand how a digital converter works and what settings to make to get the best video quality. Plus, if your VCR is not in the best condition, you risk losing the original content without any chance of recovering it.
2. Use a Video-to-DVD Transfer Service
If you don’t have the time and resources to digitize old video tapes yourself, there are plenty of video to DVD transfer services you can use. The main advantage of these services is that you don’t have to do much. You just send out the tapes and wait to receive the digitized content.
Plus, if your tapes are damaged or need cleaning, you can ask for a few extra services. Not to mention that you’ll receive an edited digital copy clean of any noise and interruptions.
3. Screen Recording
If you have time on your hands, you can always apply the screen recording method. With this, you only need a VCR, VHS tapes, a TV or projector, and a digital camera.
The method is quite simple – while the VCR plays the tapes, you record the screen of the TV or projector using the camera (you can also use a smartphone). Just make sure to stabilize the camera and account for lighting, audio, and other factors that may affect the video quality.
This method is less tech-savvy and quite cost-effective, but the results are usually low-quality, and it takes a lot of time to work your way through several tapes.
How to Preserve Your Digitized Copies
While there are plenty of educational videos schools can access online, it’s different when you have several on storage that are easy to access. Plus, many of these old videos include elements of school history and identity that are unique and precious.
So how can you make sure your digital copies won’t get damaged or leaked online?
Well, the best method to store and preserve your digital videos for the long term is a combination of cloud storage and local backup on external hard drives or solid-state drives (SSDs). Cloud storage is safe and offers easy access, while an external hard drive or SSD serves as a safety backup in case something happens to the cloud copies.
Wrap Up
At the end of the day, preserving precious memories is essential, and by converting old video formats to digital, you ensure their longevity. By using a combination of the appropriate methods and secure storage solutions like cloud services and local backups, you can safeguard your digital videos for future generations to cherish and enjoy.
Copyright ©2023 askatechteacher.com – All rights reserved.
Here’s the sign-up link if the image above doesn’t work:
https://forms.aweber.com/form/07/1910174607.htm
Jacqui Murray has been teaching K-18 technology for 30 years. She is the editor/author of over a hundred tech ed resources including a K-12 technology curriculum, K-8 keyboard curriculum, K-8 Digital Citizenship curriculum. She is an adjunct professor in tech ed, Master Teacher, webmaster for four blogs, an Amazon Vine Voice, CSTA presentation reviewer, freelance journalist on tech ed topics, contributor to NEA Today, and author of the tech thrillers, To Hunt a Sub and Twenty-four Days. You can find her resources at Structured Learning.
Share this:
- Click to share on Facebook (Opens in new window) Facebook
- Click to share on X (Opens in new window) X
- Click to share on LinkedIn (Opens in new window) LinkedIn
- Click to share on Pinterest (Opens in new window) Pinterest
- Click to share on Telegram (Opens in new window) Telegram
- Click to email a link to a friend (Opens in new window) Email
- More
5 YouTube Features for Teachers
 One of my favorite resources for explaining tech in the classroom is Richard Byrne. In this article, he discusses helpful YouTube Features for Teachers
Five Helpful YouTube Features for Teachers
YouTube offers a bunch of features that are sometimes overlooked or under-utilized despite being quite helpful when sharing videos in your classroom. In this new video I demonstrate five of those features.
Videos have become extremely popular in the classroom. Here are a few of the many articles Ask a Tech Teacher has published on this topic:
- What is the best video editing software?
- Multimedia content personalizes learning
- 9 Good Collections of Videos for Education
- Videos: Why, How, Options
- Ways to use a movie for language teaching
Share this:
- Click to share on Facebook (Opens in new window) Facebook
- Click to share on X (Opens in new window) X
- Click to share on LinkedIn (Opens in new window) LinkedIn
- Click to share on Pinterest (Opens in new window) Pinterest
- Click to share on Telegram (Opens in new window) Telegram
- Click to email a link to a friend (Opens in new window) Email
- More
Making a Family Story Video For A School Project
Working on a school project could be fun if you’re making it together with your kid. If they need to create footage to tell a story of your family. One of our Ask a Tech Teacher crew has some tips on how to make it properly
***
What Is A Family Story Video?
A family story video is a moving picture that illustrates the complete history of all your ancestors up till your generation. Many schools require their students to sit down with their parents, talk about their ancestral history, and put it all together in a video. It can be an amazing experience for homeschooling parents and their children to talk about their family and what events led them to where they are now.
How To Make A Family Story Video With Your Child?
Making a video with the kid can be tricky, and since it is a school project, you must make sure that you give your 100 percent! Here is a step by step guide that can help you make a spectacular family story video:
Gather Information
 Our lives are extremely fast-paced and busy; we might not know our family really well and, therefore, might not have the required information to give our children. This is why we need to conduct a great deal of research and look for relevant information to your lineage. A good place to start research is ‘Google’. Google might have the information even your adults might not.
You can type the name of your great-grandparents and see what pops up on the internet. If there has been a notable person in your family, there may be several articles in their name, and you can use them in your family video.
Make sure to save whatever information you find so that you can use it later. Make notes as you go, as it will help you keep track of the information.
Get the Geographical Location
Your ancestors might have lived in different places over time. You might not originally belong to the place you live in right now. Therefore, keep track of where your ancestors came from and your original homeland. Your adults might have some information they can share, so consider asking them about their origins, and then you can locate them on Google Earth. This will help your child visualize the areas and learn about your origin a little better.
Connect With Your Extended Family
Connecting with your family and learning their history is an enriching experience for every child. Reach out to your extended family members and inquire about the whereabouts of your adults. This will help you connect with the older family members, helping you gather as much information as you need. You can even ask them for pictures and videos of themselves or their parents who fall in your lineage.
Record Interviews, Gather Pictures, and Find Videos
Another method of data collection is recording interviews. Your child, with your help, can come up with a list of questions they should ask, and then you can connect them with your elders to ask them. You can use applications such as Flip to record and save these interviews. Involving your children in these activities will increase their knowledge of technology and help them learn how to use different software.
Now that you have all the material you need to add to your video, it is time for you to piece it together. To do that, you will need the help of specific tools.
Share this:
- Click to share on Facebook (Opens in new window) Facebook
- Click to share on X (Opens in new window) X
- Click to share on LinkedIn (Opens in new window) LinkedIn
- Click to share on Pinterest (Opens in new window) Pinterest
- Click to share on Telegram (Opens in new window) Telegram
- Click to email a link to a friend (Opens in new window) Email
- More
What is the best video editing software?
If you’re teaching high school videography, you want your students to use the programs that will be required in the job they end up in after graduation. You don’t want an ‘easy’ program. You want one that demonstrates the student’s expertise at an interview. But what are those programs? Here are some good suggestions:
What is the best video editing software for professionals?
 Having your content in video format surely engages more people in your business or project. Nowadays, people are keener to watch videos instead of reading texts. But having average video editing software is one thing, and professional, high-quality software that makes your videos stand out is another thing. Having a low-quality video can decrease the interest of the viewers immediately. And to avoid such inconvenience, it is best to use software that is compatible with the up-to-date video editing trends.
If you want to keep up with the newest trends of video editing and increase your brand reputation, finding the best video editing software is an important task for you. Either your videos are for entertaining, business, or personal purposes, professional editing will definitely stand out from the crowd. And to find the best video editing software for professional use can sometimes be overwhelming as there are so many options in the market. Moreover, the best video editing software is individual to each user.
With the constantly developing and quickly advancing video editing technologies, many video editing programs offer similar editing features, including similar user interfaces, special effects, file import formats, etc. And this is where the confusion of the definition “best” starts.
It depends on your needs and goals for your projects. Moreover, it depends on your video editing skill level. So when you look for the best video editing programs, ask yourself, “What video editors do other professionals in my industry use?”
Studying the market of professional video editors in your specific industry will help you understand better which software will work for you best. And when you find software that is strongly recommended by professionals, do some tests yourself. You will find free trial offers from most of the video editing programs that will help you understand whether it works for you or not. This way, you will not waste your money on software that you’ll give up using after a while.
Below, you will find some of the most used and most recommended video editing programs that can meet your preferences as well.
If you are using a PC for video editing, Adobe Premiere Pro is one of the most popular options for professionals. With this program, you will have a chance to have unlimited customizations to your files. Thanks to its nonlinear editing capabilities and extremely powerful and expansive feature set, many users prefer this program for video editing.
Pros
- It has unlimited multicam angles editing capabilities
- Offers outstanding stabilization tools
- You can import videos of up to 8K resolution
- Straightforward and uncomplicated interface
Cons
- Sound effect samples are not included
- Frequent crashes and bugs during the editing process
Share this:
- Click to share on Facebook (Opens in new window) Facebook
- Click to share on X (Opens in new window) X
- Click to share on LinkedIn (Opens in new window) LinkedIn
- Click to share on Pinterest (Opens in new window) Pinterest
- Click to share on Telegram (Opens in new window) Telegram
- Click to email a link to a friend (Opens in new window) Email
- More
Multimedia content personalizes learning
Ask a Tech Teacher contributor, Josemaría Carazo Abolafia, is an educational researcher and teacher who lives in Spain–and doesn’t own a car! He has a Masters in Ed from Penn State University (any Nittany Lion fans out there?) and is working on his EdD. Josemaria and I share the belief that “…[technology] must be transparent, like a lens; otherwise, it hinders learning.” Here’s his take on the use of videos in education:
Multimedia content as a way to learning process personalization
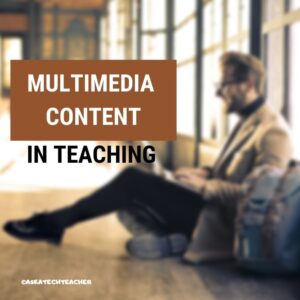
People can learn more deeply from words and pictures than from words alone. It can be called the multimedia learning hypothesis (Mayer, 2005). My experience teaching with videos supports the idea that students not only learn more deeply but also faster. Consequently, the syllabus can be enlarged when classes take advantage of multimedia means -as it happened.
Moreover, multimedia content helps to individualize the learning process for every student, who really can learn at its own pace.
The multimedia content that I use consists of about 250 videos. Most of them are between 2 and 5 minutes long. Each video contains an explanation that happened during a real class, recording what students were watching -classrooms have a projector- and listening. They can be checked out at http://youtube.com/ldts1. It might be important to point out that my students are 17 years old and over.
However, using multimedia content to elicit learning does not lack inconveniences. The same problems that hinder learning when using textbooks occur when using videos. On the other hand, the same techniques can be useful in both cases. A constructivism insight and the cognitive load theory ground the solutions proposed to avoid those inconveniences.
Three difficulties when using multimedia content
I mainly found 3 difficulties when using videos as the main learning content format:
-
- Reception overload. More frequently than wished, the student doesn’t get the gist of an explanation on video format, and she or he has to re-watch the video 1, 2 or even 3 times. There’s no doubt, it’s frustrating for anyone.
- Lack of learner’s intervention. Passivity.
- Lack of variety -not related to the content but the format: video, text, website, lecture, and so on.
Based on several learning theories, I focused on 3 ways to tackle these problems.
Share this:
- Click to share on Facebook (Opens in new window) Facebook
- Click to share on X (Opens in new window) X
- Click to share on LinkedIn (Opens in new window) LinkedIn
- Click to share on Pinterest (Opens in new window) Pinterest
- Click to share on Telegram (Opens in new window) Telegram
- Click to email a link to a friend (Opens in new window) Email
- More
9 Good Collections of Videos for Education
 When I started teaching, videos were a rarity. Common practice was to assign a chapter to read in a textbook and then a worksheet to assess student knowledge. This placed the responsibility for learning on the students, using teacher-prescribed methods, even though decades of research screamed that lots of kids perform better with images than pages filled with black-and-white text. But the excuse I used, as did most of my colleagues, was: It takes too much time to find the right videos to support so many different personal demands.
Back then, that was true. It’s not anymore.
Now there are dozens of online free educational videos that address most every academic topic imaginable. And they’re put out by recognized names in education — Khan Academy, BBC, Microsoft, Teacher Tube, as well as textbook providers like Origo. Here are ten of my favorite virtual places to find clear, effective educational videos that not only support teaching but can be used to enrich lessons for students who want more and/or backfill for those who might need a bit more help:
Share this:
- Click to share on Facebook (Opens in new window) Facebook
- Click to share on X (Opens in new window) X
- Click to share on LinkedIn (Opens in new window) LinkedIn
- Click to share on Pinterest (Opens in new window) Pinterest
- Click to share on Telegram (Opens in new window) Telegram
- Click to email a link to a friend (Opens in new window) Email
- More


