This December will again host the Hour of Code, a one-hour introduction to programming designed to demystify the subject and show that anyone can be a maker, a creator, and an innovator. Last year, almost 300,000 students (age 4-104) participated from over 180 countries and wrote almost 20 billion lines of code. The 200,000+ teachers involved came away believing that, of all their education tools, coding was the best at teaching children to think. It’s easy to see why when you look at fundamental programming concepts:

- abstraction and symbolism – variables are common in math, but also in education. Tools, toolbars, icons, images all represent something bigger
- creativity – think outside the box
- if-then thinking – actions have consequences
- debugging – write-edit-rewrite; try, fail, try again. When you make a mistake, don’t give up or call an expert. Look at what happened and fix where it went wrong.
- logic – go through a problem from A to Z
- sequencing – know what happens when
If you’re planning to participate in Hour of Code, here are a series of activities — broken down by grade — that will kickstart your effort. They can be done individually or in small groups.
Introduce each of these activities by watching “I Like Programming“, a video that discusses why the great programmers of our time fell in love with this activity.
**Grade-levels below are guidelines. Feel free to use whichever project fits your students.
Kindergarten — Human Robot
Start young programmers by teaching sequencing. Show images of stages in, say, their morning preparations. Ask them to organize the list in the order completed as they get ready for school. Call it “sequencing” and expect them to use this domain-specific word.
Next, pick an activity from the sequence — say, walking into the classroom and sitting down. Use yourself as a model of how to perform that activity and ask students for specific directions on how you would complete this task. For example:
- Move right foot, then left, 4 times.
- Turn right; walk 4 steps.
- Turn around (left and left again).
- Drop backpack to floor (or place under chair).
- Sit
Only do what they tell you. For example, if they say “walk to the chair”, look confused. They haven’t provided enough direction. They must “debug” the “script” and try again.
First Grade — Follow one of the free online Hour of Code activities
Using activities offered on websites like Code.org, Kodable, or Tynker is the easiest way to get involved as the site does the planning for you. Before starting, review the digital citizenship associated with visiting an online site (such as privacy, staying on the assigned website, and not talking to strangers).
Instead of following a pre-planned activity, try one of these sites that introduce age-appropriate programming:
If you use iPads, here are some great options:
For more suggestions, here’s a list of coding websites. Scroll to the section for first grade.
Second Grade — Animation
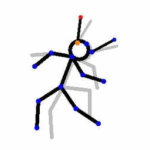
Use a free program like Pivot Stick Figure Animator or Stickman to program a stick figure. Both are simple to use, but offer different options. Preview them first to pick the one best suited to your student group.
- Pivot Stick Figure is a download. Students program a stick figure to do pretty much anything they want by adjusting the “joints” in his body
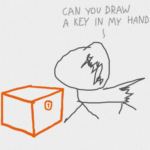
- Draw a Stickman is a web-based tool or app that turns a simple drawing into a story by asking questions of the creator. Students draw an image; the site animates it and then asks questions as the figure moves, requiring students to add detail to the Stickman’s adventure. They can pick from several story themes in creating their finished story.
If you use iPads, try Stick Nodes or Stickman.
Third Grade — Pixel Art
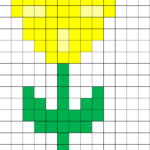
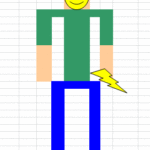
Pixel Art is the blocky drawing that is most famous for appearing in Minecraft. For this project, students will use a spreadsheet program.
Open the spreadsheet program you use in your school (Google Sheets, Excel, or another). Show students how to turn the cells into squares rather than rectangles by doing the following (or watch this video):
- Select all cells by grabbing the box that sits at the intersection of the rows and columns
- Drag a column header’s edge to resize the column width to match the row height.
Students now write directions for which color is poured into what squares to create their drawing. For example:
Blue: A1, B1, C1, D1, G1, H1, I1, J1, A2, B2, I2, J2, A3, J3, A5, A6, A7, A8, A9, A10,
When done, students have a neighbor test the directions to see if they can create the intended drawing.
Fourth Grade — Shortkeys
By fourth grade, students appreciate technology for how it can speed up their classwork and will seek out ways to use it for that purpose. Creating a shortkey is a quick and easy way to complete repetitive activities and will become a favorite with students. If necessary, adapt the following Windows/iPad directions to the device used in your school:
- Go to Start
- Right click on the desired program (either a program or a tool is fine)
- Select “properties”
- Click in “shortcut”
- Push key combination you want to use, say, Ctrl+Alt+S
- Save
On iPads, these are called “hotkeys”:
- Go to Settings > General Settings > Keyboard Settings.
- Scroll down and click “add new shortcut.”
Popular shortkeys are to open programs, activate tools, and take screenshots using the digital device’s native tool.
Fifth Grade — Macros
Creating macros gives students an easy way to add a standards-based heading or any other repetitive task required for their schoolwork without having to retype it each time. Adapt these MS Word directions to your digital device:
- Click View – Macros– Record Macros.
- Specify a name for the macro.
- Choose whether it should be a keyboard shortcut or a button.
- Once you click OK, notice your mouse looks like a cassette tape, indicating that anything you click will be part of the macro. Click all elements you would like to be part of your macro.
- Stop recording by clicking View – Stop Recording.
Click for a video on how to create macros.
Sixth-Seventh Grade — Code a Widget
Widgets are free, personalized mini-apps that do almost anything the user can program, from calculating the calories in a recipe to solving complex problems. Students can browse Wolfram/Alpha’s gallery for a widget that fits their need and embed the code into their personal website, or build their own widget from scratch using Wolfram Alpha’s Builder tool. The level of difficulty will determine how long it takes.
Eighth Grade — Alice
Alice is a free downloadable programming tool for 8th grade and above that shows students how to create interactive stories, animations, and games. Besides Math Standards, Alice supports these Common Core writing skills:
- 8.3a Engage and orient the Alice world viewer by establishing a context and point of view and introducing a narrator and/or characters; organize an event sequence that unfolds naturally and logically.
- 8.3b Use narrative techniques in the Alice World, such as dialogue, pacing, description, and reflection, to develop experiences, events, and/or characters.
- 8.3c In Alice world dialogue and action, use a variety of transitions to convey sequence, signal shifts from one time frame or setting to another, and show relationships among experiences and events.
- 8.3d Use precision and appropriate tools throughout to convey events.
- 8.3e Provide a conclusion to the Alice world story that follows events.
Divide the class into groups. Have each group pick one of the following resources, preview it, and be prepared to share their thoughts and take questions from classmates:
- basic Alice programming instructions
- overview of Alice by Middle School students
- Duke University’s Alice “Getting Started” videos are here
Next, groups open Alice and go through the tutorial by clicking “Start Tutorial” in the Welcome to Alice dialogue box. When done, create an animated avatar as follows:
- Choose “room” template, then “Setup Scene.”
- Choose “class Biped,” “class Person,” then child, female, light and avatar that is shown.
- Push OK until avatar appears in the room.
- Using circle at avatar’s feet, turn him/her until s/he faces right, and then press “edit code.”
- In tab that says “this child/person,” click on heavy black arrow facing down. Then click arrow facing right to reach individual body parts. Choose a body part and give it direction. Run program to see results. Debug program if it doesn’t work.
If students get stuck, they can go through Alice online documentation, Help files, or ask for assistance from classmates. Remind them not to give up. Keep making changes. It will work.
If you have time: In groups, students watch movie trailer of Despicable Me (or similar). Analyze how avatars move their limbs, mouths, and how they walk. Compare this to humans. For example, which leg moves first? How do joints move? How do arms and legs move in relation to each other? Does body bob up-down or side-to-side as avatar moves? List the movements and then construct a walking avatar in Alice world.
***
Here’s a collection that goes across grade levels:
It’s designed to show that anyone can learn the basics to be a maker, a creator, and an innovator. Here are unusual projects (each, about one hour in length) you can use in your classroom to participate in this wildly popular event:
- Alt Codes
- IFTTT
- QR codes
- Wolfram Alpha widgets
Alt Codes
Grade level: 4-12
Alt codes are those symbols that are created by holding down the Alt key and pushing a series of numbers, like these for copyright and the Spanish question mark:
Alt + 0169 = ©
Alt+0191 = ¿
There are hundreds of them for PCs, Macs, and Chromebooks. Click the link for your digital device.
Tip: Press the ALT key. While it is pressed, put in the numbers from your NUMBER PAD. It doesn’t work using the numbers at the top of the keyboard. Make sure the NUM LOCK is on.
Wolfram/Alpha Widget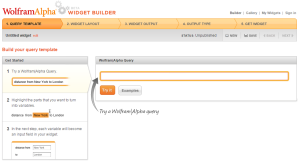
Grade level: 7-12
Widgets are free personalized mini-apps that can do almost anything the user can program, from calculating the calories in a recipe to solving complex problems. You can either browse Wolfram/Alpha’s gallery for a widget that fits your need and embed the code into your personal website, or you can build your own widget from scratch using their Builder tool. The level of difficulty will determine how long it takes so start simple during Hour of Code.
IFTTT
Grade level: 9-12
IFTTT allows users to create ‘recipes’ to automate functions, such as being notified when the weather changes or the arrival of an event. It uses a simple statement—IF THIS THEN THAT. Users create a recipe by choosing a trigger channel from IFTTT’s library, then a trigger, and finally an action channel. For example:
- IF they post a photo on Instagram THEN share it on Twitter
- IF it’s going to rain tomorrow THEN send me a text message
- IF my children are near home THEN turn on the lights
Click for more on IFTTT.
QR Codes
This is so simple, you’re going to love it:
- Open the QR Code reader on your phone or mobile device.
- Center the QR Code within the provided frame.
- Once the code is read (which happens within seconds), it will automatically activate the data.
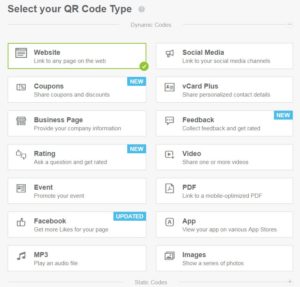
QR Codes can include data for almost anything. The tool you select will offer a list. You’ll check what you want to do and get started. Here are some of the options:
- Website URL: Scanning this QR code will give you a prompt to open the website.
- Telephone Number: Scanning this QR code will give you a prompt to call the number.
- Plain Text: Scanning this QR code will give you a prompt to search the web using your default search provider in Safari.
- SMS Message: Scanning this QR code will give you a prompt to compose the specified message to the specified number.
- Email Address: Scanning this QR code will give you a prompt to compose an email to the specified email address.
- Calendar Event: Scanning this QR code will give you a prompt to add the specified event to your calendar.
- Location of event: Provide a large QR Code at the entrance to the school or event location with a map and directions to the room where it is located. Attendees merely scan the QR Code and follow the line that leads to the event.
There are dozens of ways to incorporate QR Codes into your classroom. Here are a few, starting with introducing it during Hour of Code:
- Introduce QR Codes during Hour of Code to show students the basics of building a code and then using it.
- Record voice instructions for a project; save it as an MP3 and turn it into a QR code.
- Have new students follow a QR Code scavenger hunt to find all the important places in the school (with their parents if you do it for Back to School Night). That makes all of that information available on their phones for later use.
- Add QR codes to homework sheets that link to help. For example, if the student forgets how to solve a math problem, the QR code will take them to help.
- Embed concert programs, directions for station activities, and parent contact information as QR Codes instead of printing
- For high school students: Create their resume with a QR Code. They can easily share it with everyone, include it on a business card, or send it in an email. The recipient will automatically have it on their mobile device–no worries about losing it.
- For a school art display: Include all data on the student artist in a QR Code. It is small and doesn’t distract from the glorious artwork being presented.
- Record students reading a short story and embed it into a QR Code. Post these on a gallery in your classroom where students can stop and visit anytime for a quick story read by their classmates.
- Have students draw a picture of themselves with a QR code over their belly. On the QR Code, they’ll type about themselves with at least one fascinating fact most classmates wouldn’t know. Let students scan these with their iPads or another digital device to find out more about their new classmates.
***
What are you doing for Hour of Code? Share your projects in the comments.
More on Hour of Code:
Lesson plan bundle for Hour of Code
Jacqui Murray has been teaching K-18 technology for 30 years. She is the editor/author of over a hundred tech ed resources including a K-12 technology curriculum, K-8 keyboard curriculum, K-8 Digital Citizenship curriculum. She is an adjunct professor in tech ed, Master Teacher, webmaster for four blogs, an Amazon Vine Voice, CSTA presentation reviewer, freelance journalist on tech ed topics, contributor to NEA Today and author of the tech thrillers, To Hunt a Sub and Twenty-four Days. You can find her resources at Structured Learning.


