Category: Computer skills
Shake Hands with a Computer
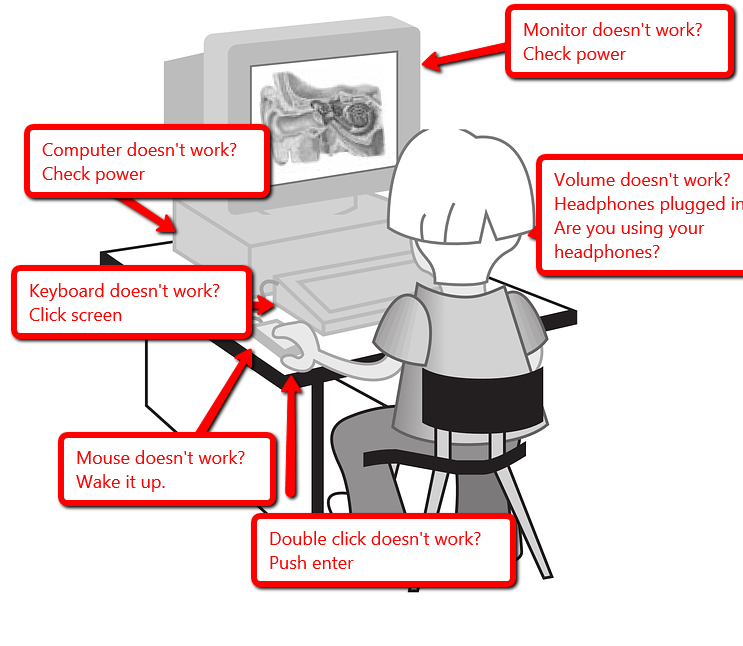
Before we go any further, make sure your child understands the different parts of the computer. If they’re 1st grade or younger, have them touch each part as you discuss it. Chat about the part. Click both buttons on the mouse. Use the scroll–see how the screen moves. Change volume on the headphones. Turn the monitor on and off.
Next, show them where each part connects to the computer. Have them plug in and disconnect the headphones, the microphone (if available). Show them the icons that tell where the plug goes. Peek around the back of the CPU–see all the plugs and wires. Are they all plugged in? Point out the duplex where the system is plugged into the wall. That has to be connected to work (you judge if they can touch this).
For k, 1, that’s it. Remind them throughout the following weeks, but that’s it. Repetition is the key to learning. For 2 and up, review the worksheet on this page. Fill it out with them and then have them complete it by themselves. That’s it. From here on, just be sure to use the right words for each part and insist they do to. It’ll stick.
Jacqui Murray has been teaching K-18 technology for 30 years. She is the editor/author of over a hundred tech ed resources including a K-12 technology curriculum, K-8 keyboard curriculum, K-8 Digital Citizenship curriculum. She is an adjunct professor in tech ed, Master Teacher, webmaster for four blogs, an Amazon Vine Voice, CSTA presentation reviewer, freelance journalist on tech ed topics, contributor to NEA Today, and author of the tech thrillers, To Hunt a Sub and Twenty-four Days. You can find her resources at Structured Learning.
Share this:
- Click to share on Facebook (Opens in new window) Facebook
- Click to share on X (Opens in new window) X
- Click to share on LinkedIn (Opens in new window) LinkedIn
- Click to share on Pinterest (Opens in new window) Pinterest
- Click to share on Telegram (Opens in new window) Telegram
- Click to email a link to a friend (Opens in new window) Email
- More
Tech Tip #12: Wrap Text Around a Picture
As a working technology teacher, I get hundreds of questions from parents about their home computers, how to do stuff, how to solve problems. Each Tuesday, I’ll share one of those with you. They’re always brief and always focused. Enjoy! (more…)
Share this:
- Click to share on Facebook (Opens in new window) Facebook
- Click to share on X (Opens in new window) X
- Click to share on LinkedIn (Opens in new window) LinkedIn
- Click to share on Pinterest (Opens in new window) Pinterest
- Click to share on Telegram (Opens in new window) Telegram
- Click to email a link to a friend (Opens in new window) Email
- More
#102: 23 Favorite Keyboard Shortcuts
Nothing makes computer work faster than keyboard shortcuts. And, it is the rare student who doesn’t claim them as their own and pass on to friends their favorites. (more…)
Share this:
- Click to share on Facebook (Opens in new window) Facebook
- Click to share on X (Opens in new window) X
- Click to share on LinkedIn (Opens in new window) LinkedIn
- Click to share on Pinterest (Opens in new window) Pinterest
- Click to share on Telegram (Opens in new window) Telegram
- Click to email a link to a friend (Opens in new window) Email
- More
#1: How to KidPix I
According to the creator, “KidPix combines art tools, graphic capability with ease of use and powerful new teacher tools to inspire creativity and learning.” According to the world, it’s the most popular drawing program for kids. Ever.
In this lesson, students learn about tools, toolbars, drag-drop, multi-media, menus—all tech basics. Every kindergarten-second grader should start with this lesson, and then move on as they master the rudiments. Besides provide tech basics, this project appeals to a student’s creativity and desire for the personal. And, it’s quick and easy. (more…)
Share this:
- Click to share on Facebook (Opens in new window) Facebook
- Click to share on X (Opens in new window) X
- Click to share on LinkedIn (Opens in new window) LinkedIn
- Click to share on Pinterest (Opens in new window) Pinterest
- Click to share on Telegram (Opens in new window) Telegram
- Click to email a link to a friend (Opens in new window) Email
- More
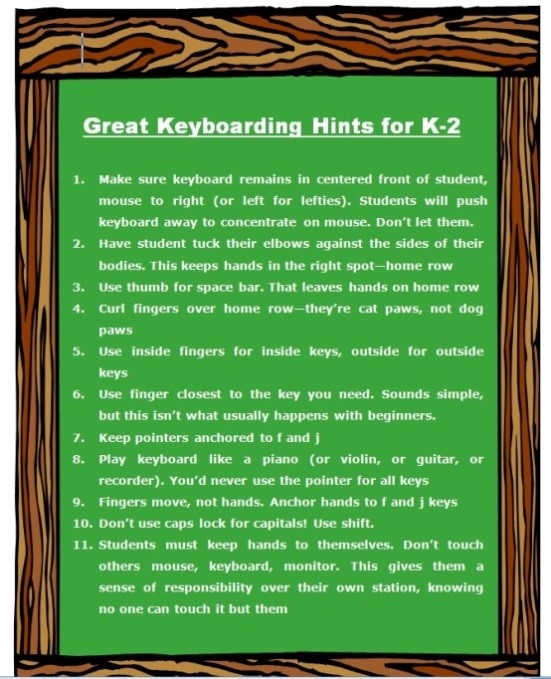
Ten Best Keyboarding Hints You’ll Ever See
These came directly from the classroom. I tested them on 400 students for a year.
Hands down, these are the most common mistakes students make that prevent them from excelling at keyboarding. Besides good tips, you might find this a different ways of saying things, for those multi-disciplinary students: (more…)
Share this:
- Click to share on Facebook (Opens in new window) Facebook
- Click to share on X (Opens in new window) X
- Click to share on LinkedIn (Opens in new window) LinkedIn
- Click to share on Pinterest (Opens in new window) Pinterest
- Click to share on Telegram (Opens in new window) Telegram
- Click to email a link to a friend (Opens in new window) Email
- More
#99: Internet ABCs for Elementary Schoolers
To use the internet, students must know the basics. I’ve put together a primer on what they should learn before getting started. It includes using toolbars and tools, address bars, how to go back to where you were, how to save a site to revisit later, and some great sites that will inspire them to learn. (more…)
Share this:
- Click to share on Facebook (Opens in new window) Facebook
- Click to share on X (Opens in new window) X
- Click to share on LinkedIn (Opens in new window) LinkedIn
- Click to share on Pinterest (Opens in new window) Pinterest
- Click to share on Telegram (Opens in new window) Telegram
- Click to email a link to a friend (Opens in new window) Email
- More
How to Web 2.0 Accessorize Your Classroom
Web 2.0 is the most exciting thing to happen to education since the schoolhouse. It is a limitless classroom, allowing students access to anything they can define. Includes what’s a digital citizen, how to create a blog, a classroom internet start page, a classroom wiki, how to join social networks and post pictures on Flikr, where to go for podcasting and online docs, and more.
Here’s where you start: (more…)
Share this:
- Click to share on Facebook (Opens in new window) Facebook
- Click to share on X (Opens in new window) X
- Click to share on LinkedIn (Opens in new window) LinkedIn
- Click to share on Pinterest (Opens in new window) Pinterest
- Click to share on Telegram (Opens in new window) Telegram
- Click to email a link to a friend (Opens in new window) Email
- More
18 Great FREE Online Keyboard Websites
When your child is learning to keyboard, they need 10-15 minutes two to three times a week. Even for kindergartners. Choose a fun software program–whichever will keep their attention when they’re young. I use Type to Learn Jr. in my school until half-way through first grade, but there are other good ones. For the older children, I use Type to Learn. I have great results with it. Students are challenged, intrigued, motivated by the prizes and the levels.
Another option is online typing sites. Typingweb is good. It’s a graduated program that keeps track of your progress. If you’re picking an online program as an alternative to software, it’s important to log in so the software remembers what your child has accomplished.
If you’re going to use online sites as part of an overall typing practice curriculum, here are some other good sites to try: (more…)
Share this:
- Click to share on Facebook (Opens in new window) Facebook
- Click to share on X (Opens in new window) X
- Click to share on LinkedIn (Opens in new window) LinkedIn
- Click to share on Pinterest (Opens in new window) Pinterest
- Click to share on Telegram (Opens in new window) Telegram
- Click to email a link to a friend (Opens in new window) Email
- More
#57: Yes, You Should Assign Keyboarding Homework
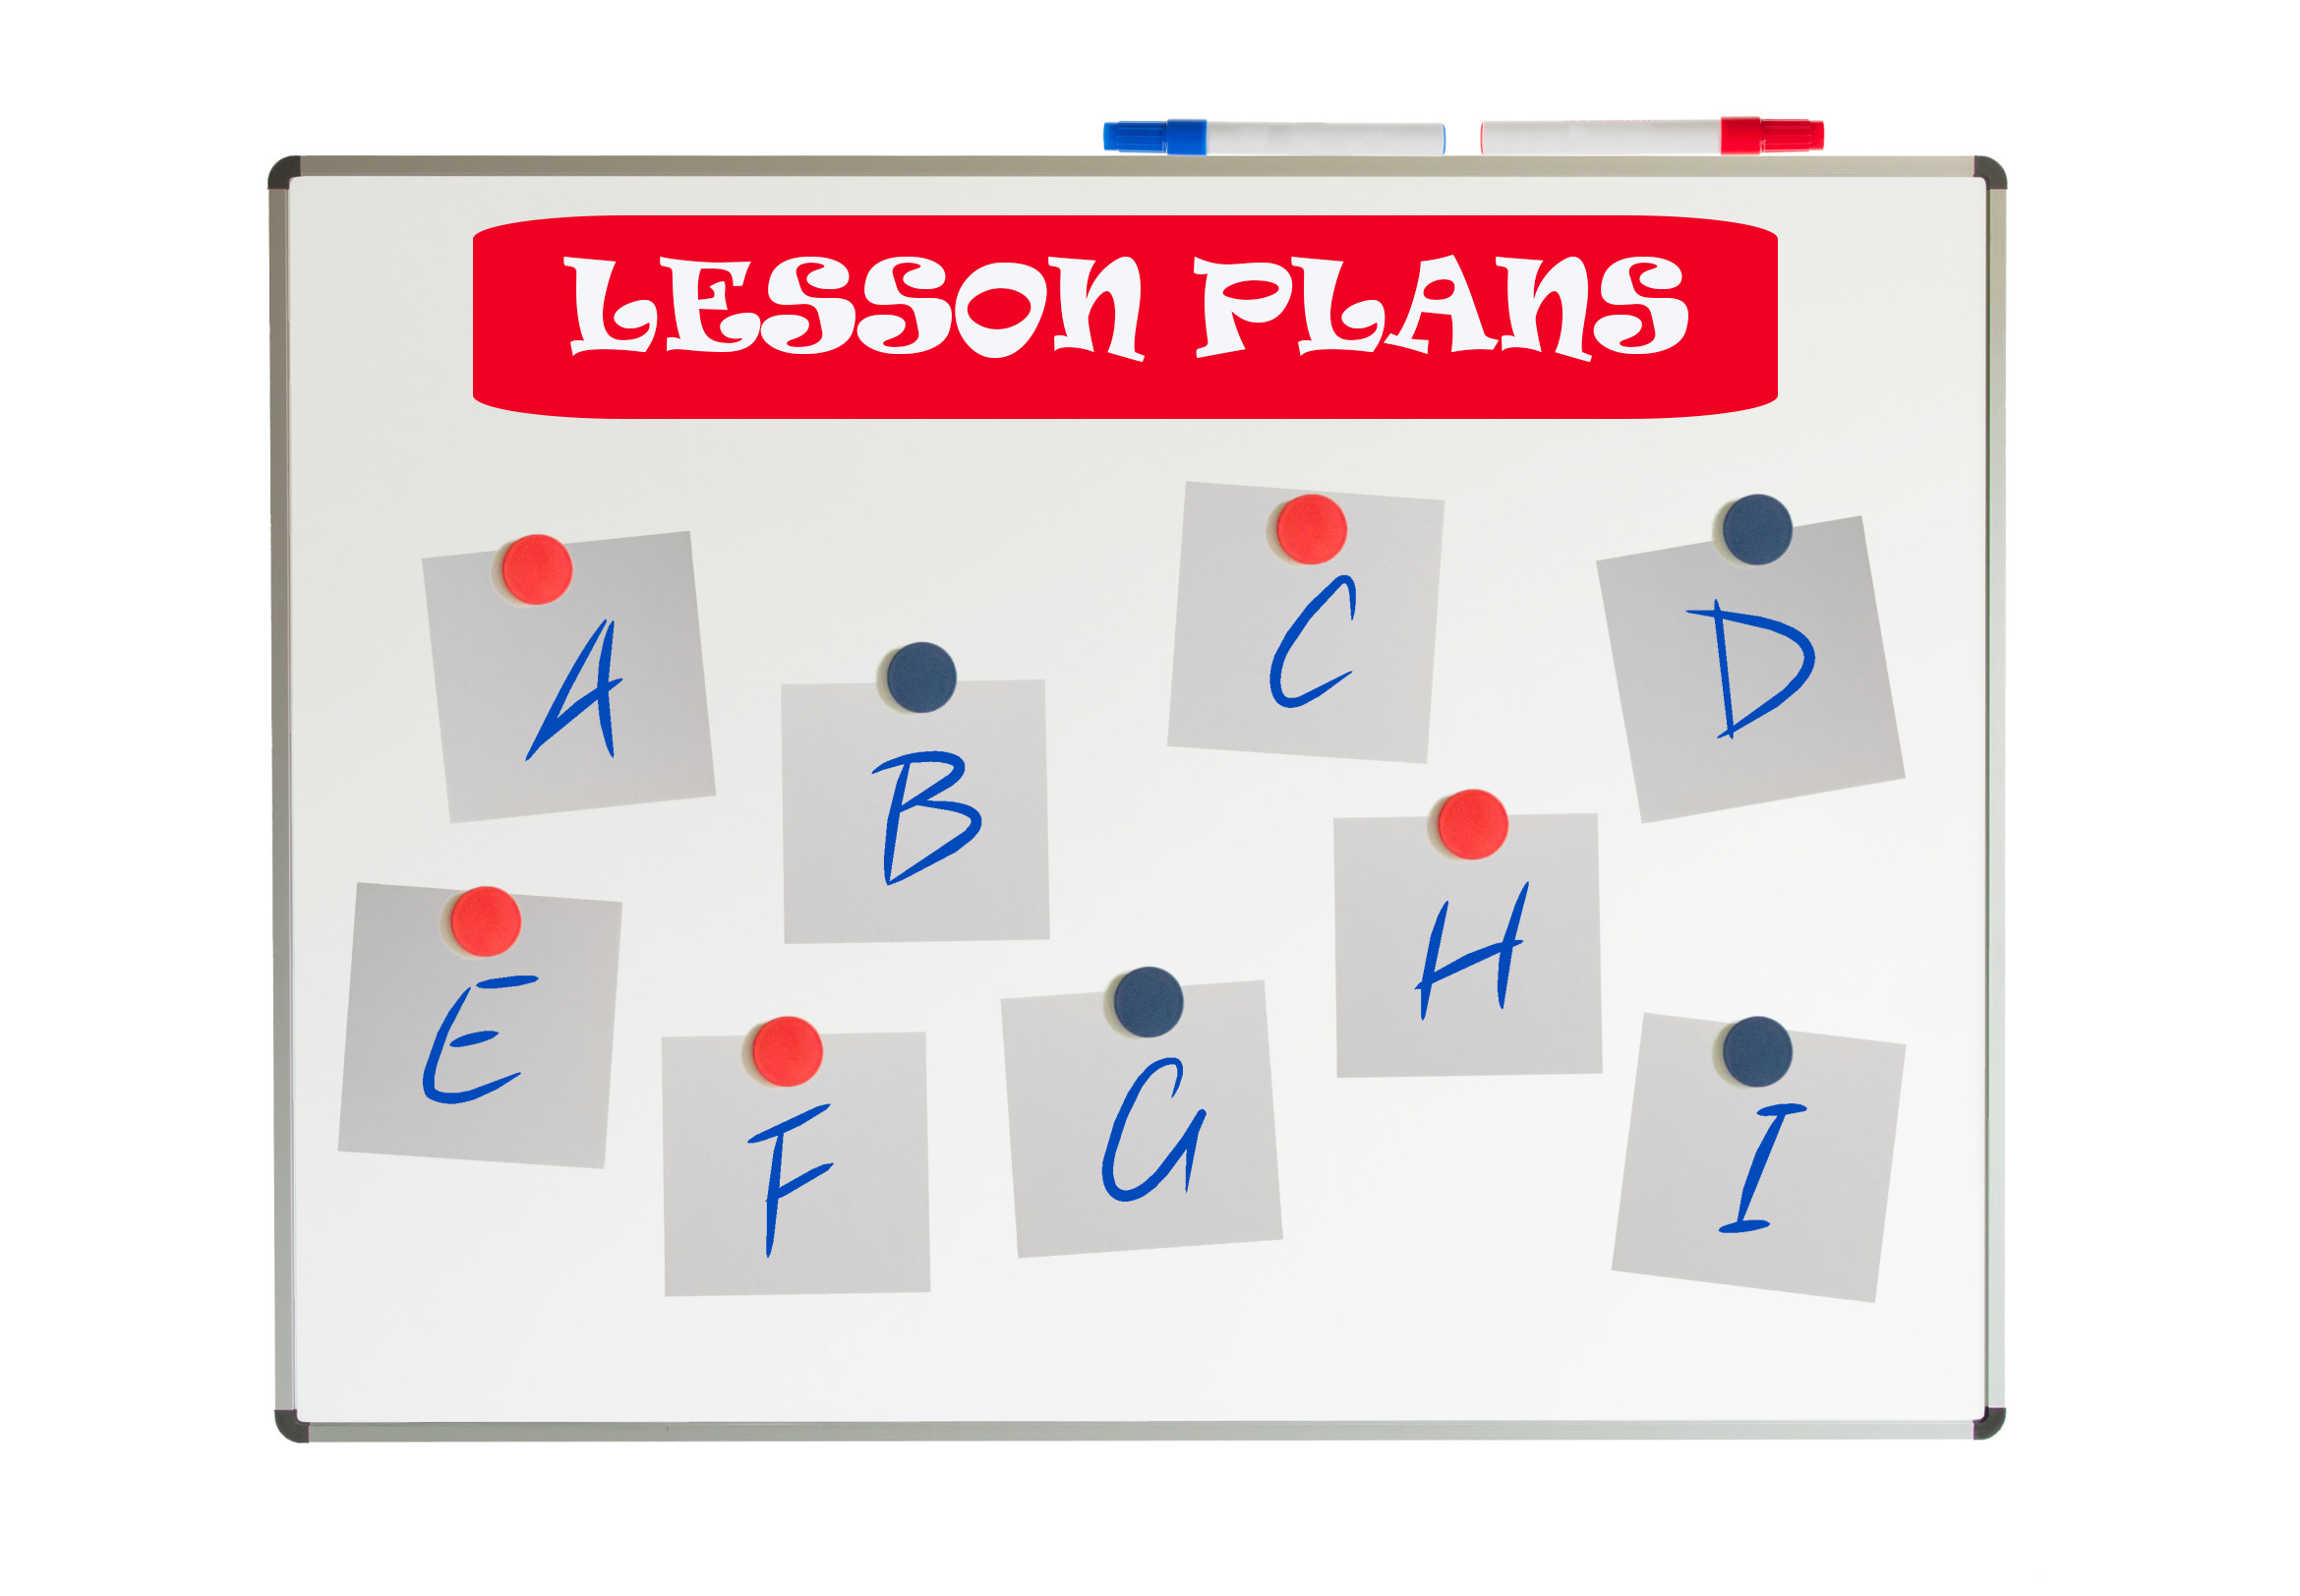
I only get my students 45 minutes a week. That’s not enough time to teach computer basics AND necessary keyboard skills. So, I give homework. It’s 45 minutes a week of homework:
If the lesson plans are blurry, click on them for a full size alternative.
Share this:
- Click to share on Facebook (Opens in new window) Facebook
- Click to share on X (Opens in new window) X
- Click to share on LinkedIn (Opens in new window) LinkedIn
- Click to share on Pinterest (Opens in new window) Pinterest
- Click to share on Telegram (Opens in new window) Telegram
- Click to email a link to a friend (Opens in new window) Email
- More
Tech Tip #7: Making Backgrounds Transparent
As a working technology teacher, I get hundreds of questions from parents about their home computers, how to do stuff, how to solve problems. Each Tuesday, I’ll share one of those with you. They’re always brief and always focused. Enjoy!
Q: When I insert my picture, the background isn’t transparent, so it covers everything behind it. I want it see-through. How do I do that? BTW, I’m using Publisher.
A: There are two ways, one simpler than the other. (more…)
Share this:
- Click to share on Facebook (Opens in new window) Facebook
- Click to share on X (Opens in new window) X
- Click to share on LinkedIn (Opens in new window) LinkedIn
- Click to share on Pinterest (Opens in new window) Pinterest
- Click to share on Telegram (Opens in new window) Telegram
- Click to email a link to a friend (Opens in new window) Email
- More

