Year: 2023
Image Copyright Do’s and Don’ts
I’ve posted this before but it’s worth repeating. Then share it with friends, colleagues, parents, even older students.
When I teach professional development classes, by far the topic that surprises teachers the most is the legal use of online images. And they’re not alone. On my blog, in educator forums, and in the virtual meetings I moderate, there’s lots of confusion about what can be grabbed for free from online sites and what must be cited with a linkback, credit, author’s name, public domain reference, or even as little as an email from the creator giving you permission. When I receive guest posts that include pictures, many contributors tell me the photo can be used because they include the linkback.
Not always true. In fact, the answer to the question…
“What online images can I use?”
typically starts with…
It depends…
Luckily, teaching it to K-8 students is simpler because most of them haven’t yet established the bad habits or misinformation we as adults operate under. But, to try to teach this topic in a thirty-minute set-aside dug out of the daily class inquiry is a prescription for failure. The only way to communicate the proper use of online images is exactly the way you teach kids not to take items from a store shelves just because they think they can get away with it: Say it often, in different ways, with the buy-in of stakeholders, and with logical consequence. Discuss online images with students every time it comes up in their online activities.
There are five topics to be reviewed when exploring the use of online images:
- digital privacy
- copyrights
- digital law and plagiarism
- hoaxes
- writing with graphics
Here are suggestions on how to teach these to your students.
Plagiarism
Discuss plagiarism. What are the repercussions of ‘plagiarism’? When must you credit material found online? In general terms, you must cite sources for:
- facts not commonly known or accepted
- exact words and/or unique phrase
- reprints of diagrams, illustrations, charts, pictures, or other visual materials
- opinions that support research
Digital privacy
Have a discussion about privacy on the Internet—how rare it is in a world where people post everything they do onto Facebook, Twitter, and blogs. Expand your discussion by watching and then discussing this video on Online Reputations.
Discuss the use of avatars to protect online privacy. If students have online accounts (through blogs, Twitter, or a class website), have them create an avatar for their profile. Here’s a list of great avatar-creation sites.
Wrap up with a discussion on the impact of hacking on privacy. Talk with students about how kids ‘hack’ game codes. Should they do it? Is it a victimless crime? What issues should they consider? What is the difference between ‘hacking’ and ‘cracking’?
Share this:
Tech Tip #35 My Program Closed Down
 In these 169 tech-centric situations, you get an overview of pedagogy—the tech topics most important to your teaching—as well as practical strategies to address most classroom tech situations, how to scaffold these to learning, and where they provide the subtext to daily tech-infused education.
Today’s tip: My program closed down
Category: Problem-solving
Q: I was working on my program and it disappeared. Did I lose my work?
A: Before you arrive at that conclusion, try these two steps:
- Check the taskbar. If your program is blinking at you, click to maximize. For some reason, it fell asleep.
- If the program closed, re-open. MS Office: A panel on the left of the re-opened program prompts you to select the auto-saved doc. The program automatically saves every two to ten minutes. You’ve lost some of your work, but not much.
From now on, save early, save often. Every ten minutes.
Sign up for a new tip each week or buy the entire 169 Real-world Ways to Put Tech into Your Classroom.
What’s your favorite tech tip in your classroom? Share it in the comments below.
Share this:
14 Online Resources about Farms
Here are a few of the popular resources teachers are using to teach about lots of different types of farms:
- Agriculture in the Classroom
- Alligator farm–video
- Dairy Farm tour-video
- Egg farm–video
- Farm Games
- Farm Games–Boowa and Kwala
- Find a dog
- Fish Farm–video
- Harvest of History–bit older
- Llama farm—video
- Organic Farm–video
- Virtual Farm–4H
- Wind Farm–video
- Wind turbine farm–video
–image credit Deposit Photos
Share this:
Should You Adopt Purpose Driven Learning?
I published this several years ago, but with the current dissatisfaction of many parents with traditional education, it’s worth revisiting.
Purpose Driven Learning (or PDL) is a concept coined by Michael Matera and Adam Moreno to summarize the philosophy that each learner’s inner strengths can be unlocked by focusing with purpose and drive. By following the guidelines for Purpose Driven Learning, teachers avoid the biggest pitfall in many lesson plans — that they are theoretic without meaning in the real world. With PDL, resources are relevant, lessons are personalized, and real-life connections are placed under a bright light. In the end, learning is changed from pedantic to powerful and students learn to reliably connect academic studies to the world outside the schoolhouse.
The Goal of PDL
In a phrase:
…the goal of Purpose Driven Learning is NOT about a curriculum that lasts a year. It’s about creating life-long learners who fuel their future passionately with knowledge.
This applies to both 1) education pursued with the goal of college or career, and 2) the critical preparation of students to succeed in life. Purpose Driven Learning, faithfully delivered with buy-in from students, will result in students willingly participating in even the boring lesson pieces (like worksheets or podcasts) as well as exciting applications like simulations and student-devised projects.
Problems implementing Purpose Driven Learning
Engaging PDL in your classroom is seen by some as teaching students what they want to learn at the expense of what they need to learn but this isn’t true. Done right, students come to understand that real knowledge relies on a solid foundation of data upon which they build their personal interests. For example, students who want to join America’s Space Force must first be grounded in the basics of science and math.
Educators who wish to use PDL often run into three roadblocks:
School Standards. Because state and national standards are often devised to serve the majority of students, they may not well-serve your students. But they do provide a necessary foundation without which the goals of your particular group can’t be met. That means that standards are taught first and additional learning is scaffolded afterward. Standards are in fact the foundation that underpins your students’ ability to achieve their PDL goals.
Share this:
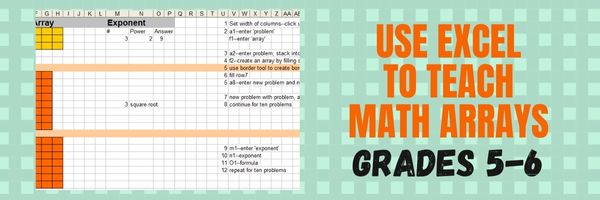
How to Use Excel to Teach Math Arrays
5 Easy Photo Skills For Your Class
Some students just don’t like writing. A page filled with black-and-white words intimidates–or bores!–them making it almost impossible to explain their ideas for an assignment. That is one reason graphic novels are becoming so popular–telling a story or thoughts with a blend of images and words The drawback is finding a photograph that fits the assignment requirements in a legal, copyright-appropriate manner. There’s one solution that’s easy and available to everyone: Create the image yourself.
One of our Ask a Tech Teacher contributors has ideas on photo effects that students will be able to quickly master and enjoy using:
5 Fun Photo Effects and Edits to Try Out With Your Class
As a teacher, you might have noticed that your students love taking photos and posting them on popular social media platforms. Others might even be dreaming of becoming influencers with their creative work. However, it is important to understand how competitive the influencer world is. In addition, there are billions of social media users, meaning that many posts seek the attention of followers. This makes it a challenge to ensure that your photos stand out.
That notwithstanding, there are a couple of photo effects and edits you can try with your class to make your photos stand out. You do not even need to be a graphic designer for you to use these effects and edits.
Here they are;
The Matte Edit
Matte can be defined as a flat and dull color, paint, or surface that does not have a lot of light. It can also be seen as the opposite of reflective or shiny photos. This is one of the photo edits that have become quite popular in the last couple of months.
To successfully get this photo edit style, your class needs to settle on one of the best photo editing tools we have today. However, even though the matte photo edit style stands out, do not be surprised if some of your classmates are not sold out.
This is because the style washes the colors of your photos a little before achieving the matte look. It is a filter for your photos and gives you a dramatic gray and black look. You can use it with street, portrait, and landscape photography.
Creating a Pop Art Piece from a Class Photo
Pop art is one of the oldest photo effects still in use today. It was originally used to portray pop culture imagery as simple and attractive pieces of art. So what do you do when you want to create a pop art piece from a class photo?
Unlike a few years ago when people had to rely on artists if they wanted pop art pieces, you can use an online photo editor for this. These photo editors come with color blocks and halftone effects that you can use as you please to get the art piece that you want.
In addition, you get different pop art filters at your disposal. You can try a couple of them before settling on one that meets your requirements. This might sound like a lot of work, but it will take you just a couple of seconds. Compare that to manually creating the same piece!
The Vintage Effect
Do you have a class photo that you would like to change with a cool but dramatic effect? Well, the vintage effect is the perfect effect for you. Even though the vintage effect has existed for some time, it is still growing in popularity.
You will find this effect in fashion, products, weddings, school, and portrait photography. When applying this effect, you need to pay attention to yellow, red, green, and blue colors. This is because these are the vintage colors you need for your photo.
The vintage effect has some similarities with the matte edit discussed above. This means that when applying this effect, you should make sure that your photo colors look as if they have been washed out. This would be the best effect if you took this wonderful southeast Asia trip as a class.
High Contrast Photo Edits
Contrast in photography can be defined as the difference between the brightest and darkest parts of your photos. Increasing the contrast of your photos gives them a cool dynamic range. Decreasing the contrast, on the other hand, makes the difference between the whites and blacks thin.
If you have a class photo that you would like to make more impactful, you should increase its contrast. You will also be making its vibrancy better. The shadows on the photos will become more visible and natural.
This is one of the best photo editing styles for those who want to increase the depth of their images. Apart from making your photos edgy, they will also look dramatic. You can use the high-contrast photo editing style with black and white as well as colored images.
Reflections and Light Flares
Reflections and light flares are among the trending photo editing styles on social media platforms such as Instagram. If you visit Instagram today, you will see this style on different feeds, especially those belonging to brands, influencers, and Gen Z.
Looking at a photo with this editing style, you might think that you need fancy photo studios and lighting to apply the same to your photos. Fortunately, you do not. This can all be achieved through a photo editing tool.
However, ensure that you choose a tool that not only comes with reflections and light flames features but also shadows, light, and prism features. Such a tool will help you achieve everything you need with this photo editing style.
But which tool can you use to apply these effects and edits to your photos? Thanks to advancements in technology, many tools can do this effectively. A tool such as BeFunky is one of the best, with many features to edit photos, create graphic designs, and make photo collages. Others include Adobe Photoshop Express, LunaPic, and Prisma Photo Editor.
No matter the course you are taking, you can apply photo effects and edit your photos like a pro. You do not need to be a graphic designer for you to use any of the effects discussed above. All you need is a cool photo editing tool, most of which are available as web, computer, or mobile applications.
Copyright ©2023 AskaTechTeachercom – All rights reserved.
Here’s the sign-up link if the image above doesn’t work:
Jacqui Murray has been teaching K-18 technology for 30 years. She is the editor/author of over a hundred tech ed resources including a K-12 technology curriculum, K-8 keyboard curriculum, K-8 Digital Citizenship curriculum. She is an adjunct professor in tech ed, Master Teacher, webmaster for four blogs, an Amazon Vine Voice, CSTA presentation reviewer, freelance journalist on tech ed topics, contributor to NEA Today, and author of the tech thrillers, To Hunt a Sub and Twenty-four Days. You can find her resources at Structured Learning.
Share this:
7 Online Resources to Teach About Vehicles
Do your first graders love vehicles? Here are a few of the popular resources teachers are using to teach about them:
- Build a car–abcya Design your very own vehicle with ABCya’s Create a Car! Choose from cars, trucks, buses, and even construction vehicles. Customize your vehicle with different wheels, engines, and more. Enjoy the ride!
- Vehicle Puzzle–click and drag puzzle pieces into place for this picture
- Freight Train Cars–video about all the cars in the freight train from Railway Vehicles
- Patterns in Vehicles–learn about patterns in this video by recognizing them in a video
- Transportation matching–mix and match vehicle parts to make your own unique vehicle
- Transportation Sequence Games–a lesson plan about transportation (but it does require a BrainPop Jr subscription)
- Vehicles–a wide collection of coloring pages for many different vehicles
Do you have any I can add to the list?
–image credit Deposit Photos
Share this:
Know Computer Hardware
Learning computers starts in kindergarten with understanding hardware. This lesson plan (#103 in the lesson plan book noted below) includes three pages. Introduce less with K, more each year until by sixth grade, students are good hardware problem solvers because they understand the basics.
Page 2 is an assessment you can either print out and have students fill in or push out to students to be completed online.
Share this:
15 Online Coloring Apps
Good websites and apps, some for kids, some for adults. Beware: Many have in-app purchases and advertising
Share this:
Tech Tip #182: Easy Speech-to-Text–and Free
 Tech Tips for Writers is an occasional post on overcoming Tech Dread among teacher-authors. I’ll cover issues that writer friends, both real-time and virtual, have shared. Feel free to post a comment about a question you have. I’ll cover it in a future tip.
You may have seen this on my education blog
A friend posted about needing suggestions for speech-to-text options for his writing. It reminded me that some people may not know that this tool is now built into both Google Docs and MS Word (for those with Office 365 only). Make sure your microphone is enabled and then here’s how to use them:
MS Word
- Open a Word doc
- Go to Home>Dictate
Google Docs
- Be sure you are in Chrome
- Open Google Docs (easiest way: type doc.new into your Chrome browser for a new file)
- Go to Tools>Voice typing
That’s it! Questions? Ask them in the comments
Copyright © 2023 AskaTechTeacher.com – All rights reserved.
Here’s the sign-up link if the image above doesn’t work:
Jacqui Murray has been teaching K-18 technology for 30 years. She is the editor/author of over a hundred tech ed resources including a K-12 technology curriculum, K-8 keyboard curriculum, K-8 Digital Citizenship curriculum. She is an adjunct professor in tech ed, Master Teacher, webmaster for four blogs, an Amazon Vine Voice, CSTA presentation reviewer, freelance journalist on tech ed topics, and author of the tech thrillers, To Hunt a Sub and Twenty-four Days. You can find her resources at Structured Learning.

