Tag: how-to
Programming Shortkeys for any Windows Tool
 Creating a shortkey will quickly become a favorite with your students. I use it for the snipping tool–because we use that a lot in class–but you can create one for any program you use a lot. Depdending upon the device you use will dictate how you do this.
Windows
- Go to Start
- Right click on the desired program
- Select ‘properties’
- Click in ‘shortcut’
- Push the key combination you want to use to invoke the snipping tool. In my case, I used Ctrl+Alt+S
- Save
Here’s a video to show you:
Now all I have to do is remember the shortkey!
iPad
Called hotkeys. These are built in on some devices and require an app on others. On the iPad go to:
Settings > General Settings > Keyboard Settings
Scroll down and click “add new shortcut.” The one drawback is that it does not include new paragraphs on the ipad/ iphone. To do that you’ll need Text Expander, but because Text Expander isn’t supported in every app, I just use this. So, for example, at the top of every Journal Entry I like to have:
Other
Use the Auto Hotkeys program
Share this:
- Click to share on Facebook (Opens in new window) Facebook
- Click to share on X (Opens in new window) X
- Click to share on LinkedIn (Opens in new window) LinkedIn
- Click to share on Pinterest (Opens in new window) Pinterest
- Click to share on Telegram (Opens in new window) Telegram
- Click to email a link to a friend (Opens in new window) Email
- More
Hour of Code: Create a Macro
Creating a macro is a quick, easy programming exercise that students fifth grade and up can accomplish with moderate supervision.
By fifth grade, students appreciate technology for how it can speed up their homework and class projects and seek out ways to use it to make their educational journey easier.. Take advantage of this by introducing pre-programming skills like creating macros. Here’s a video I shared during Summer PD:
Share this:
- Click to share on Facebook (Opens in new window) Facebook
- Click to share on X (Opens in new window) X
- Click to share on LinkedIn (Opens in new window) LinkedIn
- Click to share on Pinterest (Opens in new window) Pinterest
- Click to share on Telegram (Opens in new window) Telegram
- Click to email a link to a friend (Opens in new window) Email
- More
Hour of Code Activity: Build a Website
As a tech teacher, I see a lot of student websites. I’m always impressed with the effort, the tenacity, and often the skill, but most require ‘some additional work’ to be published.
And then I got an email from Stephen Byrne. In his quest to better learn history, he blended it with his love of of programming and built a website. It’s called History for Kids. It is exceptional, not only for its clean, intuitive presentation, but it’s age-appropriate language. If your students struggle finding research websites that use words at their grade level, suggest they build their own site like Stephen did:
Share this:
- Click to share on Facebook (Opens in new window) Facebook
- Click to share on X (Opens in new window) X
- Click to share on LinkedIn (Opens in new window) LinkedIn
- Click to share on Pinterest (Opens in new window) Pinterest
- Click to share on Telegram (Opens in new window) Telegram
- Click to email a link to a friend (Opens in new window) Email
- More
How to Create a Tagxedo
Tagxedos are an excitingly versatile tool that turn words into pictures. They’re word clouds–like Wordle, but more powerful. You can use them to share ideas, collect descriptive words and phrases about events, or evaluate the import of a website. Click here for a review of the webtool and over fifteen uses in your classroom.
We used Tagxedos this summer in Summer PD and I created this how-to video for students. Watch it–if you haven’t used Tagxedos before, you will fall in love with them.
Here are Sara’s thoughts over at Teachers and Technology, and Hardy Leung shares 101 ways to use it.
Share this:
- Click to share on Facebook (Opens in new window) Facebook
- Click to share on X (Opens in new window) X
- Click to share on LinkedIn (Opens in new window) LinkedIn
- Click to share on Pinterest (Opens in new window) Pinterest
- Click to share on Telegram (Opens in new window) Telegram
- Click to email a link to a friend (Opens in new window) Email
- More
How to Embed Student Work into Digital Portfolios
With the education spotlight on sharing and publishing, students need to be able to take a project they’ve created and place it in their blogs, websites, or another location that shares their work with others. Often, this starts with an embed code.
Here’s a video I created for my Summer PD students on how to embed a project:
Share this:
- Click to share on Facebook (Opens in new window) Facebook
- Click to share on X (Opens in new window) X
- Click to share on LinkedIn (Opens in new window) LinkedIn
- Click to share on Pinterest (Opens in new window) Pinterest
- Click to share on Telegram (Opens in new window) Telegram
- Click to email a link to a friend (Opens in new window) Email
- More
How to Teach a Tech Lesson–the Movie
I get lots of questions on how to deliver a tech class. What’s included? How do teachers blend it with other learning? How do you answer all the student questions?
Here’s a video with the answers to those questions and more. I’d love to hear how your tech class runs–add a comment at the bottom:
Share this:
- Click to share on Facebook (Opens in new window) Facebook
- Click to share on X (Opens in new window) X
- Click to share on LinkedIn (Opens in new window) LinkedIn
- Click to share on Pinterest (Opens in new window) Pinterest
- Click to share on Telegram (Opens in new window) Telegram
- Click to email a link to a friend (Opens in new window) Email
- More
How to Organize Your Classroom–the Movie
Last week, I shared ideas on how to set up your tech classroom. Today, I want to share a video:
Share this:
- Click to share on Facebook (Opens in new window) Facebook
- Click to share on X (Opens in new window) X
- Click to share on LinkedIn (Opens in new window) LinkedIn
- Click to share on Pinterest (Opens in new window) Pinterest
- Click to share on Telegram (Opens in new window) Telegram
- Click to email a link to a friend (Opens in new window) Email
- More
How to set up your tech classroom
 I’m reposting this for the start of a new school year–as a reminder to all my fellow tech teachers. Go geeks!
If you teach technology, you want to set the lab up so it’s inviting, non-intimidating, but doesn’t hide from the core ‘geek’ theme. In fact, from day one, exclaim that fact, be proud of your nerd roots. Even if you didn’t start out that way–say, you used to be a first grade teacher and suddenly your Admin in their infinite wisdom, moved you to the tech lab–you became a geek. You morphed into the go-to person for tech problems, computer quirks, crashes, and freezes. Your colleagues assumed you received an upload of data that allowed you to Know the answers to their every techie question. You are on a pedestal, their necks craned upward as they ask you, How do I get the Smartscreen to work? or We need the microphones working for a lesson I’m starting in three minutes. Can you please-please-please fix them?
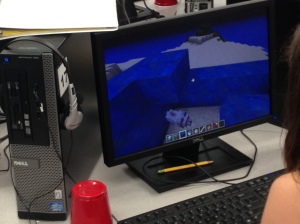
As you organize your classroom, celebrate your geekiness. Flaunt it for students and colleagues. Play Minecraft. Use every new techie device you can get your hands on. That’s you now–you are sharp, quick-thinking. You tingle when you see an iPad. You wear a flash drive like jewelry. When your students walk into your class, they should start quivering with the excitement of, What new stuff will we experience today?
Here’s a summary of what happens your first day with a class. From this, you’ll figure out how to set up your classroom (no owl themes here. It’s all about bits and bytes):
- Introduce yourself—establish your bona fides. Share your blog, your background, your awards. Give them website addresses or post them to the class internet start page. You want to be easy to find.
- Tour the classroom with students. I walk K-2 around—they like getting out of their seats. Demystify any of the tech tools you will expect them to use—where they can get help in solving problems, what’s on the walls, where’s the printer/scanner/iPads/etc.
Share this:
- Click to share on Facebook (Opens in new window) Facebook
- Click to share on X (Opens in new window) X
- Click to share on LinkedIn (Opens in new window) LinkedIn
- Click to share on Pinterest (Opens in new window) Pinterest
- Click to share on Telegram (Opens in new window) Telegram
- Click to email a link to a friend (Opens in new window) Email
- More


