 Ecolleague Mike Daugherty has over seventeen years experience in educational technology serving a variety of roles. He was recently awarded the OETC (Ohio Educational Technology Conference) Technology Innovator of the Year award and received honorable mention in the national DILA awards. In his current position, he is the director of technology for a high-achieving public school district in Ohio. His site, morethanatech.com, looks at EdTech from the district administration point of view.
He is also lucky enough to have a 3D printer. I asked him if he’d share his experiences with you. Here are his thoughts:
Similar to many school districts around the country, we decided to dip our feet into the 3D printing waters this past school year. 3D printing, Maker Spaces, and Fab Labs are the latest darlings of the EdTech world and for good reasons. The potential of these devices is almost limitless. There are a number of industry experts predicting that 3D printing will have a larger impact on the world than the Internet itself. It’s crazy to think about that, but when you read their predictions, it hard to ignore.
For this first year, we purchased two Makerbot 3D printers for use on our 7-12 campus. We elected to go with a larger model for around $3,200 and a smaller one at $1,700. The only major difference between the two is the size of the objects they can create. We had a broad spectrum of uses in mind so we asked teachers in business, science, and art to design lessons that would incorporate the new devices. After a year with these printers, here are the five big lessons we learned: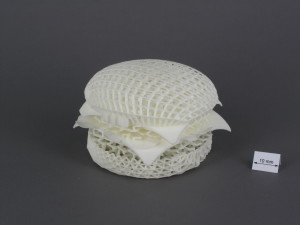
- 3D Printers Are Temperamental – We dealt with quite a few issues related to the printers being leveled correctly. An object would fail midway through the printing process because the printer had been bumped ever so slightly after the print had started. We also had several issues with the extruders (the part that does the printing) but we’ve learned that is more of a manufacturer issue than a 3D printing issue. I’d suggest you place the printers on a flat, unmovable surface. The tables or countertops that are built into the wall are a perfect location to place your printer.
- Training is hard to come by – When the printers arrived, we looked for classes where we could learn how to use and maintain the printer. We struggled to find anything, even online, other than some YouTube videos. We muddled past it and eventually got up to speed. Our mistakes turned into learning opportunities. There is not much in terms of technical support either. Make sure to set aside some time to watch the YouTube videos so you can better understand how the printer works. It comes in really handy when you have issues (and you will).
- Printing Speeds & Capacity – Only having two printers was a challenge for us as well. Even a small object (2” x 2”) can take upwards of two hours to print. Larger projects can take all day or in some cases, longer. With multiple classes with up to 28 students, it quickly became unrealistic to think every student could print an object. We had to put the students in groups in the short term. Going forward, we’ve entered into an agreement to outsource quite a bit of the actual printing to a local company. We are also purchasing two additional printers for next year to allow our students to work with the devices, even if they are in groups. I’d recommend looking into the outsourcing idea for your district as well. The cost was affordable and is going to allow every student to come out of the class with a finished, printed product.
- 3D Design Trouble – In my opinion, we underestimated the challenge our students would face using 3D design software. We used 123D from Autodesk based on recommendations and price (free for education). We gave students access to the software and expected them to pick it up quickly. On the surface it does look easy, but we quickly learned it is not as intuitive as you might think. Most of the student designed objects failed during the initial printing process with design issues. Some had open spaces that caused the extruder to skew the design. Others didn’t have the proper structures in place to act as supports during the print. While these kids may be digital natives, they still need lessons on 3D design. Moving forward, students will learn 3D design skills as part of their training and instructors will carefully review each object before printing. The offsite printer has also offered to do object verification as part of their service as well.
- A Champion is Needed – In order for a program like this to be successful, the district needs someone onsite who can be the 3D printing guru. This individual does more than just handling the printer maintenance or troubleshooting printing issues. While this is an important aspect, you need someone who can focus on the curricular side of the initiative as well. Someone who can help their colleagues brainstorm ideas on how to use this new technology in their subject area in a meaningful way. Without a champion in the district, these modern devices will gather dust in the back of a classroom as teachers struggle to find the skills or a reason to use them.
Like with any new program or technology, there will be some growing pains. We certainly had our share, but we’ve also learned a tremendous amount. We’ve outlined a plan to address all of the challenges listed above. There is no doubt that 3D printing will take on a larger role in our district in the years to come.
What are your thoughts on 3D printing? Your experiences and suggestions?
Jacqui Murray has been teaching K-18 technology for 30 years. She is the editor/author of over a hundred tech ed resources including a K-12 technology curriculum, K-8 keyboard curriculum, K-8 Digital Citizenship curriculum. She is an adjunct professor in tech ed, Master Teacher, webmaster for four blogs, an Amazon Vine Voice, CSTA presentation reviewer, freelance journalist on tech ed topics, contributor to NEA Today, and author of the tech thrillers, To Hunt a Sub and Twenty-four Days. You can find her resources at Structured Learning.

