Category: Teacher resources

Tech Tip #27: My Taskbar Disappeared

As a working technology teacher, I get hundreds of questions from parents about their home computers, how to do stuff, how to solve problems. I share those with you. They’re always brief and always focused. Enjoy!
Q: My taskbar disappeared. What do I do?
A: Push the flying windows key (it’s located between Ctrl and Alt on the bottom left of your keyboard). That brings up the start button
Need more?
Windows 11
- Step 1: Check Taskbar Settings to see if the taskbar is set to auto-hide.
Open Settings by pressing “Windows + I” on your keyboard. Navigate to “Personalization” and then click on “Taskbar.” Ensure the “Automatically hide the taskbar” option is turned off.
- Step 2: Restart Windows
Press “Ctrl + Shift + Esc” to open Task Manager. Look for “Windows Explorer” in the list, click on it, and then click “Restart” at the bottom right. This action will refresh the taskbar, bringing it back if it was unresponsive.
Windows 10

Need a New Job? Here’s What You Do

You’ve been teaching for five years and love what you’re doing. You consider yourself darn lucky to be working with colleagues that are friends and a boss who always puts your needs first. Most of the teachers at your school have been there years — even decades — and you have no doubt that, too, will be you. So, you don’t bother to keep your resume up-to-date or expand your teaching skills other than what is required for your position. In short, you found the square hole that fits your square peg.
Until the day that changes. There are dozens of reasons, from new bosses who want to shake things up to your husband gets a job in a different state. The only good news: Your boss told you already, giving you time to job hunt for the new school year. For many schools, if they’re going to make staffing changes, early Spring is when they start looking for the new people. For you as a job hunting educator, this becomes the best time of year to find a job.
Digital portfolio sites
Rather than a two-page printed document that can be lost and serves only one user, a digital portfolio posts your resume online, in an easy-to-understand format. This makes it more available, transparent, robust, and quickly updated. This tells future bosses you can use technology as a tool and can give you an edge in a competitive job market. It organizes your qualifications, evidence, and background in one easy-to-reach online location. Interested parties can check it without bothering you and decide if the fit is good. You do nothing — which can save the disappoint of sending out a resume and getting nothing but silence back.
Here are suggestions for digital portfolio sites:

Summer Reading on Education

Summer is a great time to reset your personal pedagogy to an education-friendly mindset and catch up on what’s been changing in the ed world while you were teaching eight ten hours a day. My X friends gave me great suggestions, but first:
A comment on the selections: I did get more than I could list so I avoided books with hot-button subjects teachers are divided on and focused on positive and uplifting reading. Yes, there is a lot wrong with education around the world but I wanted a selection of books that would send me — and you — back to teaching in the fall with a can-do attitude for how to accomplish miracles with your next class of students.
Having said that, here’s a granular list of teacher-approved books to keep you busy this summer:
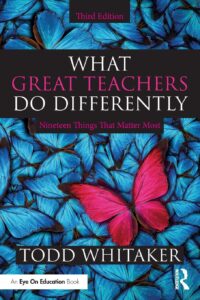
by Todd Whitaker
What are the beliefs and behaviors that set great teachers apart? In this internationally renowned bestseller, Todd Whitaker reveals 19 keys to becoming more effective in the classroom.
This essential third edition features new sections on why it’s about more than relationships, how to focus on a consistent, engaging learning environment, and the importance of choosing the right mode―business, parent, child―to improve your classroom management.
Perfect for educators at any level of experience, for independent reading or for schoolwide book studies, this practical book will leave you feeling inspired and ready to do the things that matter most for the people who matter most―your students.
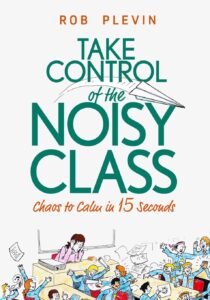
by Rob Plevin
You’ll discover:
- The simple six-step plan to minimise & deal with classroom behaviour problems
- How to gain trust & respect from tough, hard-to-reach students
- How to put an end to power struggles & confrontation
- How to have students follow your instructions… with no need to repeat yourself
- The crucial importance of consistency (and how to achieve it)
- Quick and easy ways to raise engagement and enjoyment in your lessons
- The ‘Clean Slate’ – a step by step method you can use to ‘start over’ with that particularly difficult group of students who won’t do anything you say.

What’s Trending on Ask a Tech Teacher

In the past six months, I’ve posted dozens of topics ranging from tech ed trends to how-tos, problem solving, and pedagogic discussions. I like to step back a few times a year and determine what readers are most interested in. WordPress makes that easy with their statistics.
Here’s the run-down so far this year:

Blending Montessori and Technology: Finding the Right Balance in Early Childhood Education
Blending Montessori and Technology: Finding the Right Balance in Early Childhood Education
These days, it seems that all toddlers master how to swipe across a screen before they learn to tie their shoes. Technology is everywhere and is not leaving anytime soon. For parents and educators who follow or are interested in the Montessori approach, which emphasizes hands-on activity, self directed learning, and natural curiosity, this article will come in handy. Can the Montessori ideology and technology coexist? Is it possible for children to continue using tablets, phones, etc. without losing that tangible, earthy learning process?
The quick answer is yes. But it takes thoughtfulness, balance, and a profound grasp of why Montessori works in the first place.

What Montessori Is Really About
First and foremost, we must understand a bit more about the Montessori approach and where its heart is. Dr. Maria Montessori’s belief was in child-directed learning. Rather than being told what to learn and how to do it, children find out about their world through materials that are fashioned to meet their needs at various levels of development.
Montessori materials, most commonly known as Montessori toys, are hands-on tools used in many Montessori classrooms. These tools are not noisy or flashy, most of the time these are materials made of wood. They’re meant to help develop fine motor skills, improve concentration, problem solving skills, and help a child be self sufficient. While these materials can be entertaining, that is more of a bonus than their main purpose. For example a knobbed cylinder or a bead chain, each material has a unique function that guides a child to master a skill through repetition and exploration.
Technology should compliment and never replace these moments of learning. (more…)

Need Summer Activities? Try These
Last year, we posted books you might like to read this summer. Now, we’ll focus on what to accomplish with your summer. Here are popular AATT articles. Pick the ones that suit you:

How to Keep Learning Fresh Over the Summer
15 Skills To Learn this Summer and Use Next Year
6 Tech Activities for Your Summer School Program
12 Tech Tasks To End the School Year
Here’s How to Motivate Summer School Students
Seven Fun Math Activities for the Summer Break
How to Blend Learning with Play for a Kid-friendly Summer
6 Tech Activities for Your Summer School Program
15 Skills Teachers Can Learn this Summer and Use in Next Year’s Classroom
5 Apps to learn this summer

LOTS of Resources for Kids’ Online Research

Here are quick, safe spots to send students for research (click here for updates to the list):
- CoolKidFacts–kid-friendly videos, pictures, info, and quizzes–all 100% suitable for children
- Dimensions–academic research geared for college-level
- Fact Monster–help with homework and facts
- Google Earth Timelapse–what changes to the planet over time
- Google Trends–what’s trending in searches
- History Channel–great speeches
- How Stuff Works–the gold standard in explaining stuff to kids
- Info Please–events cataloged year-by-year
- National Geographic for Kids
- Ngram Viewer–analyzes all words in all books on Google Books
- TagGalaxy–search using a cloud
- Wild Wordsmyth–picture dictionary for kids
- World Book–requires membership
Citing Resources
Kids Search Engines
How to Research
- A Google A Day
- How to Search on Google
- Power Searching (with Google)
- Teaching students to search/research
- Internet Search and Research–a lesson plan for K-8
Lesson Plans
Resources/Research
- BrainPOP–Bring learning to your fingertips™ with the BrainPOP® Featured Movie app
- Kids Picture Dictionary
- Primary Source Documents
- SparkVue–collect and display live data from iPhone etc to the iPad
- Talk to Books–research your topic based on books
- TED app–TED’s official app presents talks from some of the world’s most fascinating people

New Year, New Mindset
Here’s the outline for a seminar I teach in schools before the holiday break, to excite teachers about what they can accomplish “the second half” of the school year:
Every year, I make New Year resolutions and ignore them. I don’t promise to fulfill them. I don’t even check my progress and revise as needed. I make-and-forget, check it off the New Year’s To Do list and move on.
This year, I’m trying something different: resolutions that aren’t quantified, that won’t take extra time from my too-busy schedule. Resolutions that are, instead, about my teaching mindset. Here’s my list:
I will learn one new tech tool a month
There are so many. I get massive lists of webtools, websites, apps, extensions, and links in my inbox, mostly proclaimed as “the tool I can’t do without”. Every month, I’ll pick one and try it.
Just to be clear: Today’s tech ed tools aren’t like they used to be. The ones I’m interested in are easy-to-use, intuitive, easily differentiated for varied student needs, and free or inexpensive. Anything that requires a time commitment to learn and buckets of creativity to use is off the list. My schedule is too packed for that sort of commitment. And, I’ll unpack them with the students, authentically, as part of a project we do.
To get me started, add a comment with your favorite tool — the one I should start in January.


Holiday Gifts for Teachers

Holiday gifts for teachers are a challenge. If your child has many teachers, it’s difficult to find a personalized gift for each that is both affordable and valued. For me, as a teacher, I am always happy with a gift certificate that works anywhere but there are time-proven gifts that don’t sound sounds like “money”.
Most popular gifts
When I chat with teacher friends, here are the most popular gifts they’ve gotten over the years. Many are free and others allow you to spend only what you can afford while still giving a gift the teacher will love.
Compliments to the Administration
Happy parents often forget to share their joy with the teachers’ administrators. Too often, Principals hear from parents only when they’re angry about the teacher or some class activity. Providing unsolicited good news about the teacher’s effectiveness is a wonderful treat for both the teacher and the school’s administrators.
A Thank You Letter
Handwrite a note to the teacher telling them how much you and your child appreciate what they do. There’s little more valuable to a teacher than the acknowledgment from stakeholders that their efforts are appreciated.

13 Ways to Use Canva in Your Classroom

No one disagrees with the importance of the visual in communicating. The problem usually is creating it. Most teachers aren’t adept at matching colors, picking fonts and font sizes, and then laying everything out artistically. It’s much easier to use text with a few pictures tossed in and leave the artistry for the art teacher. When Microsoft Publisher came out a lifetime ago, it was the first major desktop publishing effort to blend layout, colors, and multimedia that was accessible to everyone. Unfortunately, it was (and continues to be) an expensive piece of software not traditionally included in Microsoft’s Office Suite (though that changed with Office 365). That meant MS Publisher skills learned at school were rarely transferrable to a home environment.
Canva changes that. It’s web-based (including apps available for iPads and Chromebooks) with a drag-and-drop functionality that makes the design process simple and intuitive. You can create professional presentations, posters, multi-page documents, marketing materials, social media graphics, and more using Canva’s more than 1 million photos, icons, and layouts, each with colors and fonts coordinated into attractive schema easily accessed by both beginners and reluctant designers. There’s no cost for basic (a yearly cost for premium) to use the thousands of free illustrations and images in the Canva library or uploading your own. For a small fee (usually $1.00), more than one million professional stock images and graphics can be used on a pay-per-use basis (most free with premium). (more…)